

I once had the pleasure of seeing a 200-year-old mahogany table in the home of a collector friend that still had its original Varnish Paint—a testament to good care and the quality of the materials. When we invest time and effort into a painting project, it is important to understand the lifespan of a varnish. Typically, a good coat of varnish will protect a surface for 3 to 20 years, depending on the type (chemical composition), environmental conditions, and maintenance habits used. This huge difference in lifespan stems from fundamental differences in how different resin systems withstand environmental stresses.
How Long Does Varnish Coatings Last
Here is a comprehensive overview of common varnish types and their typical lifespans under standard conditions:
| Lifespan of Different Varnish Types | |||
|---|---|---|---|
| Varnish Type | Indoor Lifespan | Outdoor Lifespan | Key Strengths |
| Oil-Based Varnish | 5-7 years | 2-3 years | Deep wood penetration |
| Acrylic Varnish | 4-6 years | 1-2 years | UV resistance, clarity |
| Polyurethane Varnish | 7-10 years | 3-5 years | Abrasion resistance |
| Nitrocellulose Varnish | 3-5 years | 6-12 months | Fast drying, easy repair |
| Epoxy Resin Coating | 10-15 years | 5-8 years | Chemical/moisture resistance |
| Alkyd Resin Varnish | 5-8 years | 2-4 years | Good flow/leveling |
| Phenolic Resin Varnish | 8-12 years | 4-7 years | Heat resistance |
| Polyurethane Resin | 10-20 years | 7-15 years | Extreme durability |
| Vinyl Resin Varnish | 3-5 years | 1-2 years | Flexibility |
Note: All lifespans assume proper surface preparation and application. Real-world performance may vary by 20-30% based on environmental factors.
Varnish is like skin care for wood. You can buy the best product, but if you don’t use it properly, or forget to take care of it, it won’t last. Most people wait too long to refinish, allowing damage to spread to the substrate. Watch for the following subtle signs that your varnish needs maintenance:
- Loss of hydrophobicity (water no longer forms beads);
- Increased viscosity in warm environments;
- Slight change in color (yellowing or cloudiness);
- Surface reflectivity changes (loss of gloss “depth”);
I hope everyone will take action when they see these early warning signs, rather than waiting for obvious failures to occur. Early maintenance can be done with simple refurbishment, without completely stripping and refinishing. I once saw a woman at a furniture restoration shop holding her grandmother’s walnut dresser, the paint was as wrinkled as an old woman’s wrinkles. “Can it be repaired to look like new?” she asked the paint restorer. The staff could only express their helplessness: “The only option is to completely remove the old paint.” Here’s what people at work tell me do to make varnish last as long as possible.
- Keep the surface clean: Cleanliness is more important than we think. Dust, dirt, and even fingerprints will wear down the paint over time. Try to wipe the surface with a soft dry cloth every week. Stubborn stains can be treated with a damp cloth and mild soap. Never use any abrasive or irritating cleaners.
- Try to avoid ultraviolet rays: We have mentioned above that ultraviolet rays are an important factor affecting the life of varnish. My studio faces south, and the sun shines obliquely on the workbench every afternoon. Three years ago, I did an experiment: the left workbench is shaded all year round, and the right side is left to nature. Today, the infrared spectrum of the paint on the right side shows that the molecular cross-linking degree is 37% lower than that on the left. So move your work away from direct sunlight as much as possible. If it is an outdoor item, use UV-resistant varnish from the beginning and reapply a layer of topcoat every other year.
- Reduces the effects of heat and humidity: If the varnish is used on kitchen cabinets, bathroom vanities, outdoor patios, etc. all these environments need to cope with humid air or sudden temperature changes. Please wipe off the moisture in time or use a mat for insulation.
- Repair in time: Once the varnish starts to look flat or slightly worn, use fine sandpaper (320-400 grit) to gently sand the surface to remove dust and then apply a new thin coat of varnish. Don’t wait until obvious cracks or peeling appear before you take it seriously.
- Check regularly: Every season brings new challenges – damp winter, hot summer, spring rain. Every few months, take a few minutes to check the varnished furniture and clean, repair or recoat as needed. It is recommended to apply at least two new coats of varnish every year.
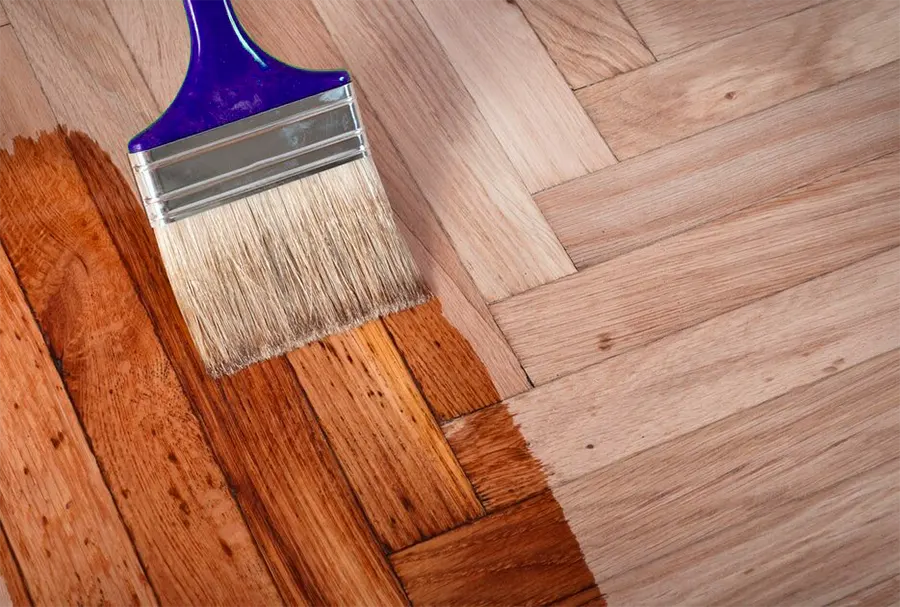
Renovating Varnish Paint
There is a varnished birch desk in my study. Over the past fifteen years, the naturally formed patina on the edges has formed a wonderful dialogue with the smoothness of the center. This made me realize that maintenance is not about fighting time, but guiding the years to leave elegant traces.
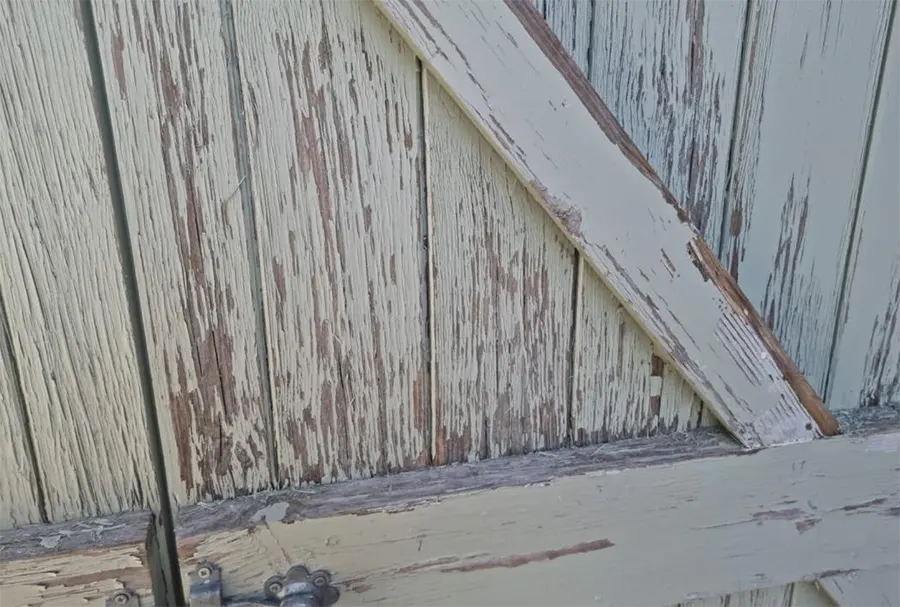
You’ve been caring for your varnished table like a child—keeping it out of direct sunlight, keeping it from wet glass, and wiping it with museum-grade cleaner. However, nothing lasts forever. Fifteen years later, the surface is cracking like desert clay, yellowing beyond recognition, and even starting to flake off in heartbreaking pieces. This has happened to me. Even with proper care, varnish will age, and the substrate must be clean and free of oil and grease before being repainted with a new varnish. Therefore, it is necessary to remove old or peeling paint layers. Now, let’s talk about how to safely free your beloved wood from that failed coat of varnish.
There are many ways to remove varnish, whether you use a paint stripper to chemically treat the surface or use mechanical methods such as scrapers, scrapers, sandpaper, or sanders. Most tutorials start by telling you to “sand it off” or “use a chemical stripper.” But after restoring more than 200 antiques, I’ve learned that removing paint is actually a controlled destruction. Diagnose before you destroy, press the damaged area with your thumb. If the varnish crumbles like stale bread, it’s an oil-based paint. If it breaks after bending like plastic wrap, it’s a polyurethane paint. This is important because:
- Oil-based varnishes are best dissolved with a methylene chloride stripper.
- Polyurethanes usually require a heat gun (more on this later)
- Epoxies require an industrial-grade paste stripper.
First of all, safety comes first. You’re dealing with chemicals or dust here, so don’t take shortcuts. You will need:
- Chemical varnish remover (also called paint stripper)
- Sandpaper (80 grit first, then 120 grit or higher to smooth it out)
- Scraper or putty knife (plastic or metal)
- Old rags
- Steel wool
- Protective gloves and goggles
- If you are working indoors, wear a respirator
- Cover up the mess with a cloth or newspaper
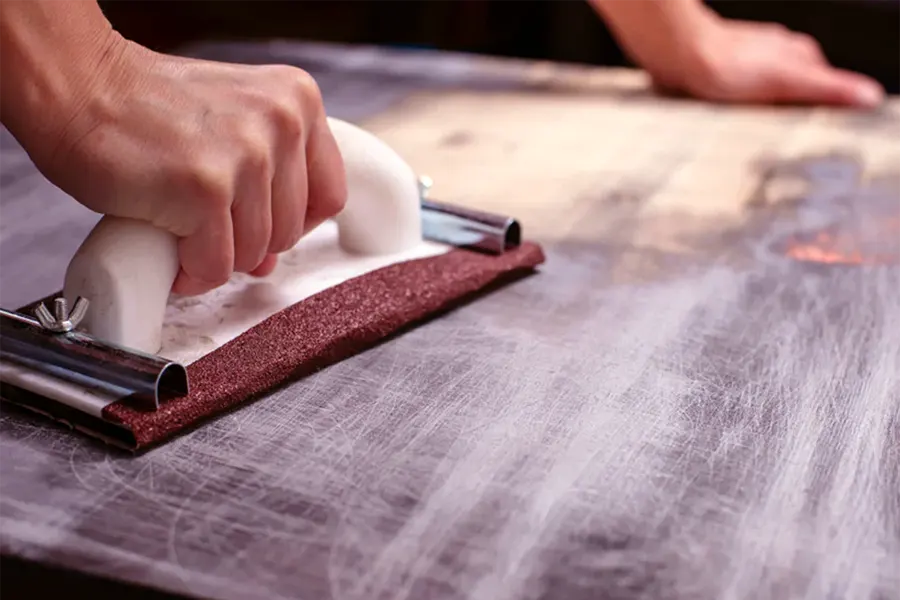
Physical sanding to remove varnish paint
Before you begin, I recommend testing it in a small corner. Varnish reacts differently depending on its age, type, and number of coats. The specific removal method needs to be determined based on the material composition of the old varnish.
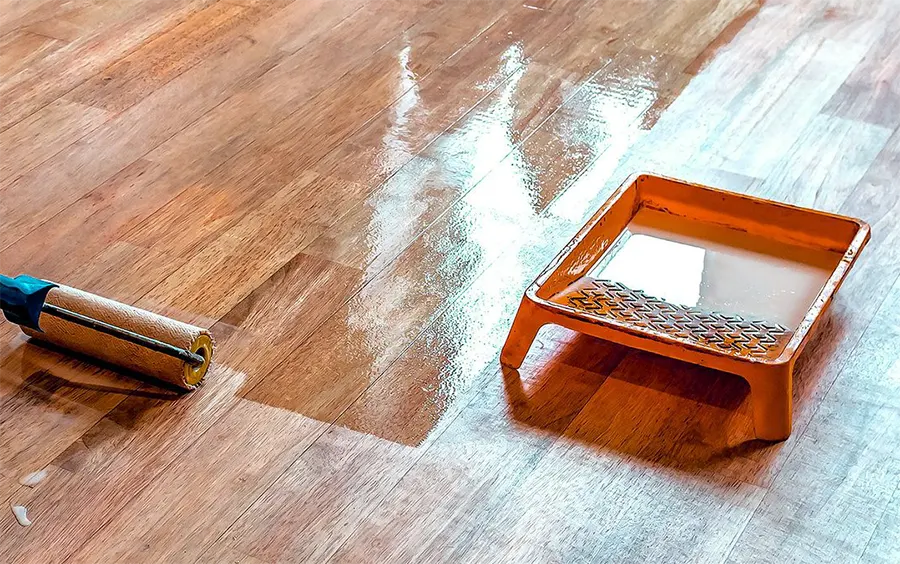
- Chemical removal method: Apply the paint stripper to the surface with a brush. Do not brush back and forth, just apply a thick layer and let it sit for 15 to 30 minutes. After softening the varnish, you can use a scraper to scrape off the sticky residue, being careful not to scratch the wood. If the debris is stuck in the gap, I usually use a fine steel wool soaked in the stripper to scrub it clean.
- Physical sanding method: You can also use 120 to 220 grit sandpaper to sand the surface until it is smooth and can be refinished. A sanding block or orbital sander can be helpful in this regard, especially when sanding large areas. If we plan to reapply a layer of varnish later, sanding is essential.
Now that we know the lifespan of various varnish coatings, we must realize that even the most durable varnishes are not immune to problems. Imagine spending hours meticulously sanding the surface of a wooden table, only to find it starting to flake or turn cloudy a few weeks later. Now that we know the lifespan and maintenance of varnishes, we must realize that even the most durable varnishes are not immune to frustrating problems that may arise during application or months later. Just last month, I received a message from a reader whose newly painted cabinet doors had developed unsightly yellow spots just weeks after installation. The disappointment in her tone was palpable—a feeling I knew all too well from my early days with varnish.
Common Problems for Varnish Paint
These problems can be frustrating, but with the right knowledge, they can often be prevented or solved. By visiting a large number of coatingsdirectory coatings service providers, I have compiled the most common problems they have encountered in their careers and provided practical solutions.
| Application Problems and Solutions | |||
|---|---|---|---|
| Issue During Application | Description | Likely Causes | How to Fix or Prevent It |
| Bubbling | Bubbles form on the surface during or right after application. | Shaking the varnish can; brushing too quickly; applying in a hot room. | Let the varnish sit before using it. Apply slowly and gently with the grain. Use thin coats in moderate temperatures. |
| Wrinkling | Surface looks shriveled, like dried skin. | Too thick a coat; second coat added before the first dried. | Sand back to a smooth surface and reapply thinner coats. Always let each coat dry fully. |
| Streaks or Brush Marks | Obvious brush lines or uneven finish. | Wrong brush type; working too slowly; over-brushing. | Use high-quality synthetic brushes for water-based, natural bristles for oil-based. Work quickly and avoid going over the same area too many times. |
| Dust or Debris in Finish | Small particles or lint visible in the varnish. | Contaminated workspace or tools; open windows. | Work in a clean, dust-free area. Wipe the surface and tools before use. Let layers settle in a calm, closed-off room. |
| Sagging or Drips | Varnish runs or pools in areas, especially on vertical surfaces. | Applied too thickly; vertical surfaces not handled carefully. | Apply thin, controlled coats. Start from the top and work downward. Don’t overload the brush. |
| Poor Adhesion at Application | Varnish doesn’t stick well during brushing, forming gaps. | Oily or waxy surface; insufficient sanding. | Thoroughly degrease and sand the surface before varnishing. Do not apply over waxed finishes. |
| Post-Application Problems and Solutions | |||
|---|---|---|---|
| Post-Application Issue | Description | Typical Causes | Fixes and Prevention |
| Peeling or Flaking | Varnish lifts off the surface in sheets or flakes. | Bad surface prep; incompatible layers underneath; moisture problems. | Strip and sand down. Reapply after proper prep. Use compatible varnish with the base layer. Seal wood if moisture is an issue. |
| Cloudy Finish | Hazy or milky appearance instead of a clear gloss. | Trapped moisture; cold or humid application environment. | Let it dry longer in warm, dry air. Sand back and recoat in better conditions if needed. |
| Yellowing | Finish turns yellow over time. | Natural oxidation in oil-based varnish; UV exposure. | Use non-yellowing varnishes (e.g., water-based acrylic or UV-stable polyurethane). Add UV-protective topcoats for sun-exposed surfaces. |
| Cracking or Crazing | Fine cracks develop, making the surface look aged. | Applied too thick; dried too fast; flexing surface. | Strip and recoat with thinner layers. Use a more flexible product if applying over moving materials like wood. |
| Uneven Gloss or Dull Spots | Some areas look shinier or duller than others. | Uneven sanding or absorption; inconsistent coats. | Reapply a thin final coat across the entire surface. Sand lightly between coats. |
| Sticky or Soft Surface | Varnish never fully dries or remains tacky. | Poor drying conditions; old or expired product; excessive humidity. | Increase airflow and warmth. If it never dries, strip and reapply with fresh product. |
| White Blush | Milky patches appear days after application. | Moisture trapped under fast-drying solvent-based varnish. | Use a mild solvent or retarder to dissolve the blush; reapply under drier conditions. |
| Surface Scratches Easily | Finish gets scratched even after curing. | Thin film build; insufficient number of coats. | Apply additional protective coats; consider a harder varnish like polyurethane for heavy-wear surfaces. |
Additional Tips to Avoid Varnish Disasters:
- Always test varnish on a scrap material before applying it to your final project.
- Label your product and check the expiration date – old varnish can cause stickiness and unevenness.
- Ventilation is important, but don’t let wind or dust blow in. Controlled airflow is your best bet.
- When in doubt, less is more – thin coats, slow build, and patience win every time.
- Make sure Varnish Paint is compatible with the underlying paint or stain. If unsure, test on a small area first.
Laboratory testing consistently shows that most clearcoat failures result from inadequate surface preparation or improper application technique rather than product defects. In fact, I tested several leading brands of Varnish Paint under controlled conditions, and properly applied varnish remained intact for years, while sloppily applied varnish had problems within months. Have you ever encountered a stubborn varnish problem that was hard to fix? Share your experience in the comments below. Remember, even the most experienced painters will occasionally encounter problems – the key is knowing how to solve them effectively.