“I spent three days varnishing this table – why is it still sticky?” This is the message a user left us the other day. I guess many people have encountered this situation. Applying varnish may seem simple, but the preparation before application and the condition of the brush after it leaves the surface are crucial.
How long should I wait before using this coffee table? Some Varnish Paints will never fully cure if applied incorrectly. I have compiled all the lessons learned from past Varnish Paint disasters (and customer rescues) into this guide. You will learn:
- The professional way to Varnish Paint;
- The steps to apply Varnish Paint;
- The time and factors required for the varnish to dry thoroughly;
No nonsense – to avoid all your hard work going to waste (I learned this the hard way when I was young).
How to Apply Varnish Paint?
Applying varnish isn’t just about slapping on a glossy finish—it’s a science. A single mistake, like rushing surface prep or using the wrong tools, can lead to peeling, bubbling, or uneven textures. Whether you’re coating a vintage wooden table, protecting an Acrylic Painting, or sealing outdoor furniture, this guide breaks down professional techniques to achieve flawless results.
Method of applying varnish.
The application method you choose depends on the size of the project, the surface geometry, and the desired finish. But most people know the whys and whys. Here are the four main application methods in action:
Brushing
This method of painting is suitable for small to medium-sized projects with intricate details (e.g., carved wood furniture, picture frames). I usually recommend using a good quality natural bristle brush when applying oil-based varnishes. The flexibility of natural bristles allows them to penetrate deep into the pattern and evenly lift the varnish. Of course, you can also use synthetic fiber brushes (nylon/polyester) to reduce costs when applying water-based varnishes. Hand brushing allows for precise thickness control, but overuse will cause obvious brush marks. I recommend dipping only 1/3 of the bristles in the paint and gently scraping off the excess paint at the top of the can – this action can reduce dripping problems by 80%.
Spraying
Spraying is much more efficient than hand painting when facing large flat surfaces (e.g., automotive parts, cabinet doors) or complex shapes (e.g., wrought iron doors). HVLP (high volume low pressure) spray guns spray a fine and even mist to achieve an ultra-smooth surface. But be sure to wear an air-supplied mask when you do this. Last year, a painter used a regular mask to spray polyurethane varnish for the sake of convenience, and ended up being hospitalized for three days for VOC poisoning. During the spraying process, remember to keep a distance of 6-8 inches (about 15-20 cm) from the surface, depending on the flow rate of the nozzle, to avoid orange peel texture.
Rolling

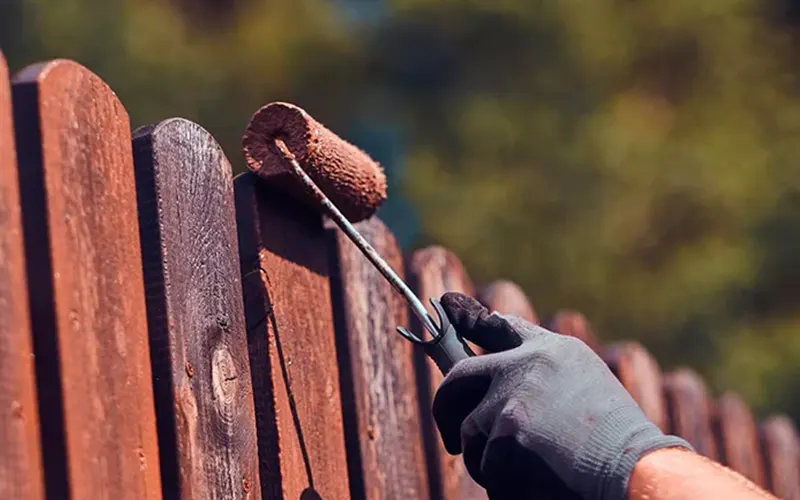
Roller varnish – painting method
For wide, flat areas (such as floors and tabletops), short-neck foam rollers are more labor-saving than traditional brushes. For thin coatings such as acrylic varnish, use a short-neck foam roller; for thicker polyurethane coatings, use a microfiber roller. After coating, remember to immediately use the roller to press lightly in one direction. The technical term is “rolling back”. This action can squeeze out the newly formed bubbles. I have compared and tested that the number of bubbles on the paint surface after rolling back is reduced by 95%.
Dipping
For small, removable items (such as hardware and decorative parts), direct dipping is the most thorough. Dip the item into the varnish and then hang it in a dry place to drip dry.
Varnish Application Methods at a Glance | |||
---|---|---|---|
Method | Best For | Tools Needed | Key Tip |
Brushing | Detailed woodwork, small areas | Natural/synthetic brush | Work in the direction of the grain |
Spraying | Large flat surfaces, metal | HVLP spray gun | Maintain consistent nozzle distance |
Rolling | Floors, tabletops | Foam/microfiber roller | Back-roll to eliminate bubbles |
Dipping | Small hardware, trim | Dipping tank | Strain reused varnish to remove debris |
Pre-treatment before varnishing.
Last year, when I was restoring a 19th-century walnut wardrobe, I was lazy and skipped the sanding step. As a result, the varnish I applied flakes off in less than a month. Since then, I know that the success of varnishing is 30% product and 70% technique and patience. Ignoring preparation is a major cause of varnish failure.
First remove all contaminants – dust, grease, wax or old flaking coating. If you are covering an old paint layer, the solvent wipe test is essential. Use a cotton swab dipped in acetone to draw circles on the old paint. If the cotton swab changes color, it means that the old paint is a solvent-based paint such as nitro lacquer and must be completely sanded off, otherwise the new paint will “bite” and wrinkle.
Then it’s polishing. Wood should be sanded at least three times: first use 120 grit coarse sand to smooth burrs, then use 240 grit medium sand to eliminate scratches, and finally use 400 grit fine sand to polish to a baby-skin touch. Before changing the sandpaper every time, you should use a vacuum cleaner with a soft brush to clean it thoroughly, otherwise the coarse sand particles left will become an invisible killer.
Metal surface pretreatment is more particular. Aluminum window frames need to be treated with phosphoric acid passivation liquid to treat the oxide layer first, and stainless steel needs to be degreased with acetone before sandblasting. The most easily overlooked is the choice of sandpaper mesh: after sandblasting, gently brushing with 400 mesh water sandpaper can increase the adhesion of varnish. I have compared it with an electron microscope, and the bonding strength of varnish on the metal surface after brushing has increased by 3 times.
If you find defects on the surface during the sanding process, you can use epoxy putty (for wood) or body filler (for metal) to fill cracks/dents. Polish it smooth after curing.
Finally, wipe the surface with a lint-free cloth soaked in denatured alcohol or a special sticky cloth to remove residual dust. After the above steps, our rework rate can be greatly reduced.
Start applying varnish.
After pre-treating the painting surface and selecting the Varnish Paint required for the project, the painting steps are actually very simple, just have your hands on it. Choose one of the above-mentioned painting methods according to the actual needs of the painting project. To help you have a clear understanding of the painting process, I attached a demonstration video above.
The Following Points Need to be Noted During the Painting Process-
- Environmental control:
Varnish is as sensitive to temperature and humidity as violin strings. The best conditions are a temperature of 20-25℃ and a humidity of 45-60%. I have personally seen construction workers apply varnish paint at a high temperature of 45°C outdoors, and a large number of “prickly heat bubbles” appeared on the paint surface. Later, this problem was solved by using a two-component catalytic varnish that was cured through a chemical reaction. - Primer sealing:
Water-based varnish needs to be coated with a special sealer first. There is a trick: adding 5% alcohol to the varnish can both speed up drying and enhance penetration. But note that this method is only suitable for hardwood. Softwood such as pine will crack due to alcohol dehydration. When the ambient humidity exceeds 70%, water-based varnish is prone to “white fog”. At this time, it is recommended that you switch to catalytic oil-based varnish. - Layered construction:
Draw multiple layers to achieve the required varnish thickness. The thickness of each layer should be controlled at 0.03-0.05mm, which is equivalent to the thickness of A4 paper. Too thick will prolong the curing time, and too thin will lose the protective effect. There is a trick to judge: look at the surface at an angle after coating. If you can still clearly see the wood grain, it means the thickness is just right.
Remember: always test paint in an inconspicuous area first – I once almost ruined a 17th century ebony relief carving using the wrong thinner on a museum project. Need more targeted advice? Describe your specific project in the comment area, brainstorm and let everyone help you customize a plan.
How Long does Varnish Coatings Take to Dry?
Now that you’ve finally finished applying the varnish, give your waist a good rub. Now comes the next question, but it’s an important one: How long does it take for the clearcoat to dry? You’re probably like me, and you can’t help but touch it every five minutes: “Is it dry? Can I touch it?” Time is of the essence. If you move on to the next step too early, you may ruin the surface you worked so hard to protect. Under most normal conditions, a water-based clearcoat will be dry to the touch in 30-90 minutes. But it may take several days, sometimes even longer, depending on the type of clearcoat, ambient humidity and temperature, coating thickness, and the material of the substrate being painted. Don’t confuse “surface dry” with “completely hard”. I’ve seen too many varnishes applied beautifully only to be ruined in the drying stage.
- Hard Dry: 24-72 hours, can resist slight friction, but the solvent is still evaporating.
- Full Cure: 7-30 days, the molecular chains are completely cross-linked and reach the ultimate hardness.
Ambient temperature and humidity play a role. In 2021, MIT’s coatings lab found that for every 10% increase in humidity, oil-based polyurethanes take 23% longer to cure. Warm, dry air helps speed up drying, while cold or humid environments extend drying time. So if you’re working in a damp garage or on a rainy day, be prepared to wait longer. It’s recommended that you apply varnish at a temperature of 18-25°C. Below 10°C, the chemical cross-linking reaction is almost stagnant; above 35°C, the quick drying of the surface will seal the bottom solvent, forming a “sandwich bubble”. You can also try putting a few bags of silica gel desiccant (cat litter grade) in the corner. It costs less than $5 and can reduce drying time by 15%. Airflow also plays a role. A well-ventilated space helps the varnish dry evenly and reduces the possibility of sticky spots.
The thickness of the coating is also important. Thin layers dry faster than thick layers. I have done tests where the curing time increases exponentially for single layers thicker than 0.1mm. The best strategy is to apply 3 thin coats (0.03-0.05mm each) rather than 1 thick coat. It’s tempting to apply one thick coat in order to get it done quickly, but this usually backfires. You end up with a sticky surface that takes a long time to dry.
The material you’re applying the varnish to will also affect drying time. Porous surfaces like raw wood will absorb some of the varnish, which helps it dry faster. The surface of dense woods such as walnut and rosewood resists the penetration of varnish, so the varnish just sits there and takes more time to set. This is why I specifically mentioned sanding the surface in “Applying Varnish” above, which gives it a better anchor point.
Of course, not all varnishes are the same. Different types of varnish have different ingredients and additives, resulting in different drying and curing times. Here’s a breakdown of the drying times that each common type typically takes:
Real-World Drying Times by Varnish Type | ||||
---|---|---|---|---|
Varnish Type | Dry to Touch | Safe for Light Use | Full Cure | Watch Out For… |
Oil-Based | 6–8 hrs | 48 hrs | 14–30 days | Dust nibs; keep pets away! |
Water-Based | 1–2 hrs | 24 hrs | 7–14 days | Milky haze in humidity |
Polyurethane | 4–6 hrs | 72 hrs | 21–30 days | Yellowing on light woods |
Nitrocellulose | 30 mins | 8 hrs | 3–7 days | Toxic fumes—ventilate! |
Epoxy Resin | 12–24 hrs | 7 days | 30 days | Bubbles if mixed wrong |
Hopefully, these drying times will help you better plan your project timeline. If you’re painting furniture, floors, or any surface that people touch or walk on, it’s best to give the varnish time to fully cure. Use your fingernails to gently press in hidden areas. Only if there are no indentations is it fully cured. That way, your paint stays clear, strong, and durable.
The next time you face a wet paint surface, you might as well make a cup of tea and quietly observe the light and shadow playing on the coating – this flowing luster hides the precision of material science and also reflects the temperature of the craftsman’s spirit. The life lesson that varnish curing teaches us is that sometimes waiting is better than rushing, just as some beauty needs time to be preserved. If you’re rushing to finish a painting project, try these three safe time-saving tips:
- Adding 0.3% cobalt naphthenate (search “drying agent” on Amazon) to an oil-based varnish can reduce the curing time by 50%. But it must be accurately weighed – too much will cause the paint film to powder.
- Use a three-dimensional infrared heating lamp to continuously illuminate the painted surface, but be careful not to increase the temperature too much in an instant.
- Mix fast-drying/slow-drying solvents (such as turpentine + xylene) to allow the surface layer to solidify first and the bottom layer to continue to penetrate. This method is used by the German Knotz company for high-end musical instrument paint.
Varnishing is as much about science as it is about patience. Now you know that drying ≠ curing – “dry to the touch” doesn’t mean your project is foolproof. Controlling humidity, temperature and varnish thickness always trumps a thick, hasty application. In addition: painting is just the beginning, follow-up cleaning and regular maintenance inspections can ensure that the benefits of this Varnish Paint coating are maximized.
Need supplies or local assistance? Browse varnish suppliers on coatingsdirectory.com (compare drying times and VOC levels) or contact a pro in your area instead of doing it yourself.
FAQs
How do I apply varnish to get a smooth finish?
Using a good quality brush, apply thin, even coats. Don’t rush – take your time to avoid streaks. For best results, spray application is recommended where conditions permit. Sand lightly between each coat to ensure a smooth finish.
Do I need to prep the surface before using varnish?
Yes, it is important to prepare the surface properly. A clean, dry, sanded surface is essential for the varnish to work. Pre-treatment determines how well the varnish adheres and how smooth it is.
Can varnish be dried overnight?
Varnish of any composition can be allowed to dry overnight. The premise is to control the humidity, temperature and cleanliness of the environment. Allow sufficient drying time to penetrate deeply into the substrate.
Why is my varnish still sticky after two days?
If the varnish is applied too thick, it may remain sticky because the solvent in it cannot evaporate completely. If you choose an off-brand varnish, it is not ruled out that the cause is an imbalance of the curing agent in the varnish ingredients.