Porcelain coatings are prized for their durability and beauty, but they eventually become brittle and deteriorate over time, just like us. Maybe one day you suddenly find that your previously beautiful porcelain coatings have begun to crack, chip, or lose their bright luster. Don’t be afraid. Let me teach you some practical techniques, precautions, and tips. I believe that with your hands-on skills and my guidance, you can restore porcelain coatings to their former glory.
How to repaint porcelain coatings?
Have you ever seen a chip, scratch, or dull spot on your porcelain? Let’s be honest, it’s frustrating for anyone to see this. But don’t worry, porcelain coatings can be repainted to restore the beautiful, smooth surface they once were. When you encounter the following situations, it’s time to repaint porcelain coatings:
- Visible chips, cracks, and scratches make the porcelain surface look bad.
- Over time, the gloss of porcelain coatings on porcelain surfaces becomes dull or faded.
- Tired of outdated pastels and want some modern and stylish colors.
- Restore antique claw-foot bathtubs and old-fashioned kitchen sinks to restore their charm.

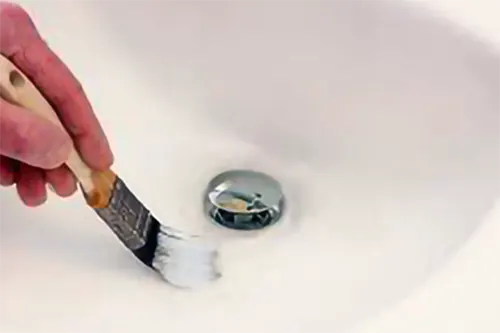
repaint porcelain coatings
Repainting porcelain can breathe new life into its surface (a fresh coat of enamel paint), making it look new again, while also adding extra protection. But it’s not a job that can be done quickly. It requires some preparation, the right materials, a methodical approach, and most importantly, patience. Here are the valuable lessons I have learned from renovating porcelain coatings in the past:
Gather tools and materials
The tools you need to prepare in advance include:
- Porcelain paint suitable for the base porcelain (usually epoxy, but polymer coatings with corresponding characteristics can also be selected as needed).
- Sandpaper (220-400 grit, the higher the grit of the sandpaper, the finer the particles and the lighter the sanding marks).
- Paintbrush or airbrush (depending on your preference and available equipment).
- Cleaning supplies (soap, degreaser and rubbing alcohol).
- Tape and dust cloth (to protect surrounding areas that do not need to be renovated).
- Personal protective equipment (gloves, masks and goggles).
Prepare the surface
Don’t ignore this step. Proper preparation directly determines the success or failure of the final renovation effect. First, use a degreaser to thoroughly clean the surface to remove any oil or soap scum. Then lightly sand the porcelain with fine sandpaper to roughen the surface to help the new paint adhere better. Wipe off dust and let the surface dry completely.
Mask off surrounding areas
The porcelain repainting process can be messy. Use tape to mask off edges and nearby areas you don’t want to be affected.
Apply paint
Once everything is ready, you can start the official repainting. This process is just like applying porcelain coatings for the first time. You can go to our corresponding blog to learn more about it. I won’t go into details here.
Here are a few pro tips for a smooth refinish of porcelain coatings:
- The odor of porcelain coatings can be strong. Work in a well-ventilated area or consider using a fan to keep air circulating.
- Avoid painting in extremely hot or cold conditions; ideal temperatures are generally between 50–85°F (10–30°C).
- If you’re new to the art, try repainting smaller porcelain items, like cups or plates, to get familiar with the process.
What to do when porcelain coatings crack or chip?
Porcelain coatings are tough, but they are not indestructible. I still remember the trepidation I felt when I first discovered hairline cracks in my porcelain-coated sink. I was always worried if it would get worse or further damaged. If you are also experiencing problems with cracking, chipping, or peeling of porcelain coatings, don’t fear you are not alone. Most porcelain owners experience these problems over time, especially with frequent use or accidental knocks. There are ways to prevent or solve these porcelain coating damage problems.
| Problem | Causes | Solutions | Prevention Tips |
|---|---|---|---|
| Cracking | – Impact damage from heavy objects – Thermal shock (e.g., extreme heat changes) – Age-related wear | – Clean the surface thoroughly to remove dirt and grease. – Use a porcelain repair kit to fill cracks (these typically include filler and touch-up paint). – For deep cracks, consider professional restoration. | – Avoid placing hot items directly on porcelain-coated surfaces. – Use mats or trays to protect sinks and counters from heavy or sharp objects. – Perform routine inspections to catch minor issues early. |
| Chipping | – Dropping heavy/sharp objects – Poor-quality initial coating application | – Sand the chipped area lightly to smooth edges. – Apply a porcelain touch-up paint in thin layers, allowing each to dry. – For severe chips, use epoxy filler before painting. | – Be cautious when handling heavy or sharp objects near porcelain surfaces. – Reinforce high-impact areas with protective padding if possible. |
| Peeling or Flaking | – Improper cleaning products (abrasive or acidic) – Moisture trapped under the coating – Low-quality paint or poor prep work | – Remove loose flakes carefully with a scraper. – Sand the area gently to ensure smoothness. – Recoat with high-quality porcelain paint, ensuring proper surface preparation. | – Use gentle, non-abrasive cleaners to maintain the coating. – Ensure thorough drying before applying new coatings. – Invest in high-quality porcelain paint for better adhesion and durability. |
| Staining Around Damage | – Exposed underlying material absorbing moisture or spills – Poor sealing | – Clean stains with a gentle, non-abrasive cleaner. – Seal the exposed area with a clear waterproof sealant before repainting. | – Wipe up spills immediately, especially with acidic or colored substances. – Periodically reapply a clear protective coating to high-use surfaces. |
Cracks and chips can expose the material underneath, making it vulnerable to water damage, rust, and even structural weakening. Addressing these issues early can prevent them from escalating into expensive repairs or replacements. Because in life, no matter how careful we are, accidents always happen. For example: dishes will fall, enamelware will slide, and the surface of the bathtub will wear away. As long as we take the right measures, we can extend its service life and maintain the beauty of porcelain.
How to repair porcelain coating discoloration or fading?
With the cracks and chips in your porcelain coating fixed, let’s talk about another common problem – discoloration or fading. After years of use on your ceramic sink, you’re staring at a dull or unevenly colored porcelain surface and wondering if it’s beyond salvage. The good news? With the right approach, you can restore it to its former glory.
While porcelain coatings are durable, they are not immune to environmental stresses. Discoloration or fading can also occur over time during daily use. Let’s look at the culprits for this phenomenon:
- Long-term exposure to abrasive or acidic cleaning can strip away the protective layer on the surface of the porcelain coating, causing dullness or discoloration.
- Prolonged exposure to high UV sunlight can cause the coating to fade, especially on outdoor surfaces.
- Water, grease, and other food particles that sit on the surface of the porcelain for a long time can penetrate into small flaws, causing visible stains.
- Even high-quality porcelain coatings can lose their original vitality after years of wear and tear.
To repair discoloration or fading, the steps are simple and very similar to those mentioned above for repairing cracks or chips: clean thoroughly, sand, touch up with a color-matching paint, and finally, apply a protective sealer. Just like that, our porcelain coating will look like new again.

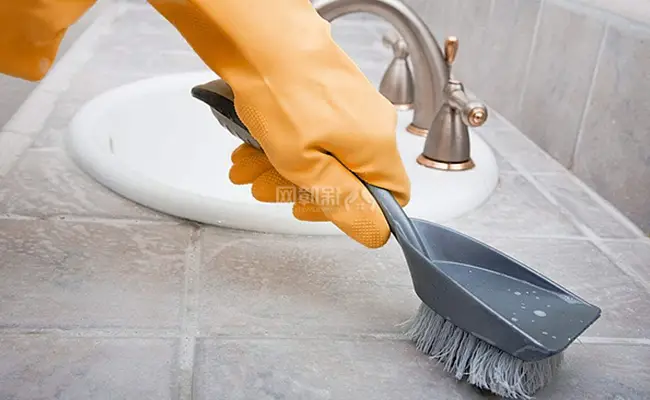
Cleaning the porcelain surface
Prevention Tips.
It’s always easier to prevent discoloration on porcelain coatings than to fix it. We can minimize the risk of discoloration by taking the following steps:
- Stick to a pH-neutral cleaner designed for porcelain surfaces in your daily cleaning routine.
- For outdoor items with porcelain coatings, consider shading or covering to reduce UV exposure.
- Clean up promptly when food, oil and other stains drip on the surface of porcelain coatings.
- Applying a protective sealant every 6-12 months will help maintain its shine.
By understanding what causes discoloration and taking a few proactive steps, you can keep your porcelain coating looking fresh and beautiful for years. In my opinion, repairing discoloration requires a lot of patience, but it’s worth it. Watching the ceramic surface change from dull to dazzling under your own hands gives people a great sense of accomplishment.
Causes and solutions for poor porcelain coating adhesion.
We’ve addressed cracking, chipping, and fading in porcelain coatings, but if you look at very old porcelain surfaces, you’ll notice flaking or blistering. These are all manifestations of poor adhesion of porcelain coatings due to factors such as surface preparation, application techniques or environmental conditions. Let me tell you why adhesion problems occur so you can better solve them.
- Inadequate surface preparation: Dust, grease or old coatings can create a barrier that prevents new porcelain coatings from properly adhering.
- Improper curing or drying: If a porcelain coating is not given enough time or the proper conditions to cure, it will not bond effectively to the substrate.
- Moisture issues: Applying a porcelain coating before the surface is completely dry can cause flaking or blistering.
- Low-quality coating materials: Cheap coatings or incompatible materials have weak bonding properties, no matter how well the surface is prepared.
- Environmental factors: High humidity, extreme temperatures, or dusty conditions during the application of porcelain coatings can destroy adhesion.
How to fix poor adhesion?
If you inadvertently see bubbles or peeling off of Porcelain Coatings, don’t worry too much. With the right approach, we can fix these poor adhesion conditions.
- Look closely at the affected area to see if there is any moisture or grease underneath the coating.
- Remove the poorly adhering coating using a scraper or chemical stripper.
- Clean the surface with a degreaser or mild abrasive cleaner to remove dirt, oil, and old residue.
- Once the surface is dry, lightly sand the surface with fine sandpaper to create a texture that the coating can adhere to.
- Apply a high-quality primer designed for porcelain or non-porous surfaces.
- Once the primer is dry, apply a high-quality Porcelain Coating. Yes, it may cost more, but the results are worth it.
As with the previous repair work, the entire process must be performed in a clean, dry area with minimal dust. Don’t think I’m long-winded, this is a lesson I learned the hard way. If you’re having trouble fixing your bond, remember: repairing your bond is totally doable.
For those seeking professional services or high-quality products, coatingsdirectory.com is your go-to resource. Use our tools to find trusted Porcelain coatings suppliers and on-site services in your area. If you’ve found a unique trick or effective technique, please share it in the comments. Your insights may save someone a lot of headaches.
FAQs
Can porcelain coatings be repaired after they have been cracked or chipped?
Of course! Cracks or chips in porcelain coatings can be repaired using the right tools and procedures. You can learn how to do this in our corresponding content above.
What causes porcelain coatings to lose adhesion?
Inadequate surface preparation is usually to blame. Moisture, dust, oil or old coatings can weaken the adhesion.
Can I repaint the porcelain coating without stripping the old coating?
Yes, but the necessary pre-treatment is still essential! For example: sanding the old coating, removing all dust, applying porcelain primer.
How can I prevent porcelain coatings from cracking in the future?
Avoid heavy blows or sudden temperature changes, as these can weaken the coating over time.

