With its unique glassy sheen, enamel paint is unique in the paint world and is renowned for its durability and abrasion resistance. But achieving the perfect enamel coating effect is not easy, it requires the applicator to master the knowledge of careful application, correct dilution methods, and how to remove it safely when necessary. Follow me and learn everything you need to know about using enamel paint: application techniques, dilution tips, and safe removal methods. Plus, we’ll explore the fascinating science behind the enamel softening temperature range and how this affects the final finish.
How to Apply Enamel Paint Correctly?
Enamel paint has a hard, smooth surface that is not easily chipped, scratched, or heated. The secret is that it requires special preparation and correct application. Enamel paints come in two forms: liquid and powder (click here to see the differences in enamel paint types). Different types require different application methods. Liquid enamel paints are usually sprayed or brushed, while powder enamel paints are usually electrostatically sprayed or dipped. Follow me to see the corresponding preparation and application methods required for each enamel paint.

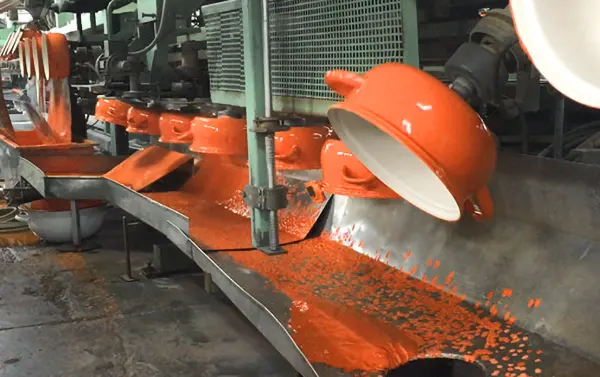
Introduction of Flow Enamel Coating
Proper surface preparation ensures that the enamel coating bonds well to the metal, reducing the risk of flaking or surface unevenness over time. Don’t be lazy!
- Clean the surface:First, clean it thoroughly to eliminate dust, oil, or contaminants. For metal surfaces, consider using a strong degreaser or solvent cleaner to remove any residue that may affect adhesion.
- Sand the surface:After cleaning, choose sandpaper that matches the type of substrate. This step helps to form a consistent, rough texture that the enamel can effectively grip.
- Sandblasting: For heavy-duty projects with more rugged or industrial applications, sandblasting is highly effective in removing rust, old paint, or tough residue, helping to create an even etched profile on the metal surface, allowing the enamel to adhere more securely.
- Primer when necessary:While enamel coatings generally bond well to clean metal, adding a primer designed specifically for enamel can improve adhesion and ensure even coverage, especially on porous or previously painted surfaces.
Once you have prepared your surface, you can begin applying the enamel paint. Follow me to efficiently apply liquid and powder enamel coatings:
Liquid Enamel Application
- Thinn the paint if necessary:Stir the enamel well, then add a compatible thinner (usually 5-10%) to achieve a viscosity suitable for spraying or brushing. We will go into more detail about thinning enamel paint below, so I will skip it for now.
- Protect the perimeter:Move any items that do not need to be painted away at a safe distance, and cover items that should not be painted.
- Apply thin, even coats:Use a spray gun or brush to apply the paint, applying thin, even coats from top to bottom. Avoid thick coats, as thick coats can trap air bubbles and result in an uneven surface. Allow each layer to dry completely before adding the next; typically, this takes about 8-12 hours.
- Dry at room temperature:Allow the liquid enamel to cure in a well-ventilated space, which may take several days. If conditions permit, use a hot air box or infrared high-temperature lamp to speed up the curing and hardening process.
Powder Enamel Application
- Electrostatic Spraying or Dipping:For powder enamel, use electrostatic spraying to firmly bond with the metal surface (click to view detailed application operations of powder coating). Dipping is an alternative method that immerses the entire part in a powder bath and can be used to evenly cover complex shapes.
- Heat cure:Powder enamel coatings are thermosetting coatings, so high temperature curing is required after the powder enamel is adsorbed on the surface to form a durable glass-like surface. Heat the coated metal in an oven to around 1400°F, depending on the enamel specifications. This process is called vitrification, which causes the powder to fuse and harden into a strong, scratch-resistant layer.
- Slow cooling:After curing, let the item cool naturally to avoid any cracking or stress in the enamel coating.
Properly applied enamel coatings create a long-lasting, beautiful finish that resists wear, heat, and scratches. By following these steps, you can achieve a smooth, professional finish, whether you use liquid or powder enamel. Each paint application technique has different advantages, so choose the best method based on the specific needs of your project.
How to Thin Enamel Paint?
Whether you are using water-based or oil-based enamel paint, properly thinning the enamel paint can make or break your paint job by affecting everything from smoothness, evenness, and drying time. Here’s how to properly thin both types of enamel paint.

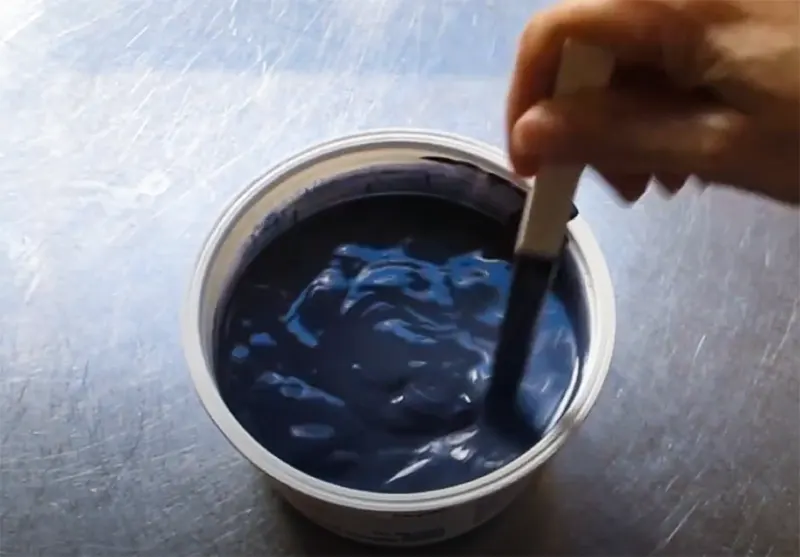
Thinning enamel paint
Dilute water-based enamel paint
Water-based enamel paint can be diluted with just water, gradually adding water starting at 5% of the paint volume and stirring thoroughly to mix. This is a process where you can check the consistency by dipping a brush or stick into the paint: if it comes off the brush smoothly but is still a little tacky, you’ve probably hit your sweet spot.
It’s recommended to keep the dilution as low as possible, as too much water can weaken the paint’s coverage and adhesion, causing the coating to peel or fade over time. You can also buy some thinners specifically for water-based paints, but read the enamel paint instructions carefully.
Diluting oil-based enamel paint
For oil-based enamel paint, use paint thinner or mineral spirits. Be sure to choose a thinner that is compatible with your specific brand of paint. The mixing process is the same as with water-based enamels, starting with a small amount – add about 3% thinner to the paint, mix thoroughly, and then test for flow. Thinning oil-based enamels requires more care, as over-thinning can weaken the gloss and make it harder to dry evenly.
If the paint feels too viscous after testing, add a few more drops and mix again. Use ventilation during mixing, as oil-based thinners can give off strong fumes.
One final tip: Check with the enamel to see if the paint manufacturer has specific thinning recommendations. Following brand guidelines can significantly improve the results of professional-quality enamel paint.
How to Remove Enamel Coatings?
With the above knowledge, we know the technology of applying enamel coating. But sometimes we accidentally apply enamel coating to places where it shouldn’t go, or need to refurbish old enamel coating. Removing enamel coating, especially when dealing with hard coatings on metal surfaces, can be a challenge. Follow me, we combine previous painting experience and a lot of research to explain the technology of removing liquid enamel paint (water-based or solvent-based) and high hardness powder enamel in a simple and clear way, hoping to help you.
Removing Liquid Enamel Paint
Liquid enamel paint is generally easier to strip than powder paint, but it still requires the right technique.
- Removing Water-Based Enamel Paint: Use a commercial paint stripper or a latex paint remover designed for water-based paint, such as Goof Off. Apply the remover evenly with a brush and let it sit for five minutes. The enamel paint will begin to soften. Then use a plastic scraper, cloth, or fine steel wool to scrub away the softened coating.
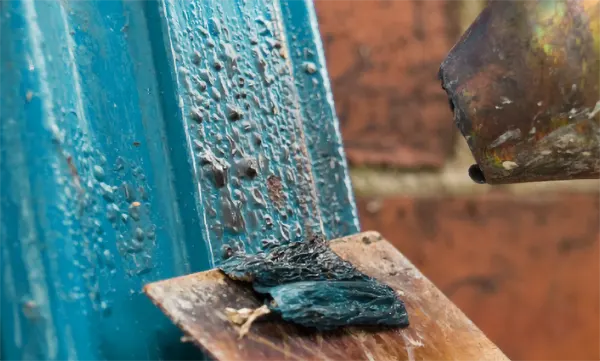
- Removing Solvent-Based Enamel Paint: Solvent-based enamel paint requires a stronger stripper, such as methylene chloride stripper, to be effectively removed. As with water-based enamel paint, let it sit after applying the stripper. Once the enamel paint begins to bubble and lift, use a plastic scraper to gently scrape away the paint. Residue can be removed with mineral spirits or acetone, or for metal surfaces, fine sandpaper to sand away any remaining marks.
If the enamel is particularly thick or stubborn, a heat gun can help loosen the layers. Apply heat from the heat gun evenly to the painted surface and carefully scrape away the softened paint with the scraper. This method works well for both water-based and solvent-based enamels, but care needs to be taken to avoid overheating and damaging the underlying substrate.

Chemical stripping of enamel coating
Removing Powder Enamel Coatings
Removing powder enamel coatings is a completely different story. Known for their toughness and high-temperature cure, they require some unique methods to remove cleanly.
- Sandblasting (sandblasting or pearl blasting): Sandblasting is one of the most effective methods for removing powder enamel from metal. High-pressure abrasives remove enamel layer by layer without the use of chemicals. This method can reach every nook and cranny. Be sure to use the correct abrasive media – typically, aluminum oxide or glass beads work well for powder enamel.
- Chemical strippers for powder enamel: There are chemical strippers on the market that are specifically formulated for powder coatings, which may be a good option if you don’t have sandblasting equipment nearby. These chemical strippers are generally stronger than regular paint removers and may require longer application times.
- Thermal stripping in a burnout oven: For industrial-grade powder coatings, a burnout oven heats the surface to about 800°F or higher, effectively breaking down the enamel layer. This process works best for metal parts and is typically used in professional industrial mass production environments because it requires specialized equipment.
- Electrochemical Removal: In certain circumstances, powder enamel coatings can be removed from metal surfaces using an electrochemical process. The piece with the enamel coating is immersed in a solution and an electric current helps to loosen and lift the coating. Although this method is less common, it is only used for particularly intricate or valuable items and is usually handled by professionals.
Choose the most suitable removal technology for the current situation according to the type of enamel coating, substrate and budget. Also be sure to pay attention to safety issues and always wear gloves, goggles and a respirator when working with chemicals or sandblasting. And keep the operating space ventilated. Follow these and you can smoothly re-coat or restart your project.
What is the Softening Temperature Range of Enamel?
Enamel is essentially glass that has been melted at temperatures between 1000°C and 1300°C. The softening temperature of the enamel is a key factor in forming a strong, glass-like coating, and typically enamel coatings soften between 1000°F and 1400°F (538°C and 760°C), depending on the composition and intended use. Within this range, the enamel transitions to a softened state (pliable but not completely melted), and as it cools, it forms a very elastic coating.
The softening temperature of enamel depends on its basic ingredients, primarily silicon dioxide (SiO₂), aluminum oxide (Al₂O₃), and various metal oxides. Silicon dioxide provides structure, while aluminum oxide increases the durability and scratch resistance of the enamel. To make enameled parts durable, silica (SiO2) glass must be modified (it cannot be used in its original state), its melting point is too high, its coefficient of thermal expansion is too low compared to steel, and its adhesion to steel is zero. Therefore, various additives are added to obtain enamels depending on the final function, such as: pigments, opacifiers, clays (cobalt and chromium), others used as dispersants and flotation agents.
- Color stabilizers:Cobalt and iron oxides are often added to obtain rich, stable colors, helping to keep the enamel visually attractive even under extreme heat or UV exposure.
- Surface modifiers:Calcium carbonate and borax improve flow and adhesion during the softening phase. These additives ensure even distribution on complex surfaces and provide a seamless, glassy appearance.
- Scratch and wear enhancers:For applications requiring high durability, zirconium oxide and titanium oxide are added to increase hardness.
- Heat and corrosion protection:Lithium compounds and phosphates can enhance the thermal stability of enamels and prevent rust and corrosion.
These carefully selected additives not only adapt the enamel to its end use, but also adjust thermal properties or improve adaptability to environmental factors. The unique combination of high temperature resistance, durability and customizable properties make enamel coatings a first choice for a wide range of industries. You can find reliable enamel coating suppliers that support complete custom coating formulations through the CoatingsDirectory platform.
Can you paint enamel over latex?
Yes, you can paint enamel over latex paint, but preparation is essential. Latex paint is flexible and can cause adhesion issues for enamel paint, which tends to be harder. For a smooth, long-lasting finish, thoroughly clean and lightly sand the latex surface, then apply a primer suitable for both enamel and latex paint.
Can you paint latex over enamel?
You can paint latex over enamel, but additional preparation is required because the glossy surface of the enamel will resist the new coat. Start by sanding the enamel surface to remove the gloss and create a slightly rough texture for better adhesion. Then clean the surface to remove any dust and apply a bonding primer to connect the two coats.
What is the difference between enamel and latex paint?
Enamel paint has a hard, glossy surface, making it ideal for high-traffic areas or outdoor areas. Enamel paint is durable but less flexible. Latex paint, on the other hand, is water-based, more flexible, and dries faster, making it ideal for interiors. Enamel paint is easy to clean and has a long lifespan, while latex paint is more convenient and environmentally friendly. More differences between them can be found in our corresponding blog.
Why does enamel paint peel from latex?
Peeling often occurs because enamel is rigid and does not adhere well to the flexible surface of latex. This can be avoided by using a primer between the two coats, which helps them to adhere. In addition, daily maintenance of enamel coating is also crucial.
Is it necessary to sand before painting over existing paint?
Yes, especially if the existing paint is glossy, as sanding will roughen the surface so it adheres better.

