Asphalt pavements have replaced traditional cement pavements on a large scale. Well, in order for an asphalt road to function effectively, it is important to draw lines on its surface and regularly repair cracks. Today, let me tell you all about the painting and maintenance that may be involved in asphalt pavement in the future.
What is the Process for Painting Lines on Asphalt?
We often see some clean, clear marking lines on parking lots and daily asphalt surfaces. Maybe you are facing the same spraying project now. This simple task requires some proper skills and preparation.
The first thing to consider is which method to use: hand drawing or machine drawing. Usually fine painting for small venues (personal courtyards, small gardens) can be done by hand. But if the area of the asphalt line painting project is particularly large, it is recommended that machine painting can make your work easier and more efficient.
Once you have thought about the painting method, you can prepare the corresponding tools. Manually drawing lines on asphalt requires a lot of preparation, including: brushes, rollers, and copy templates. Machine marking only requires a well-functioning marking machine. In addition, the paint for marking is essential.
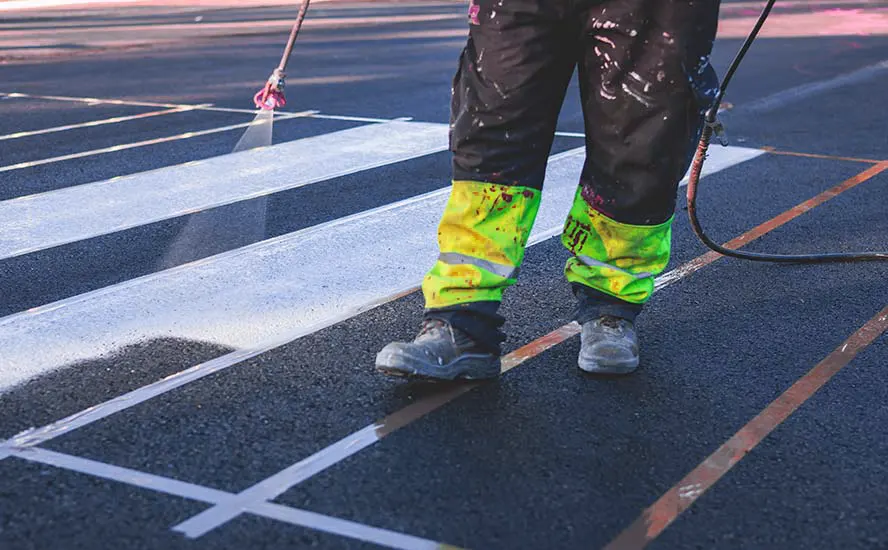
- Manual painting:This method requires the use of brushes and rollers to apply marking paint on a prefabricated template. After placing the template in the target position on the asphalt pavement, use a brush or roller to trace and apply a thin and even layer of paint. The manual process requires enough patience to ensure that steady pressure is maintained to obtain precise and consistent coverage.

Manually marking lines on asphalt
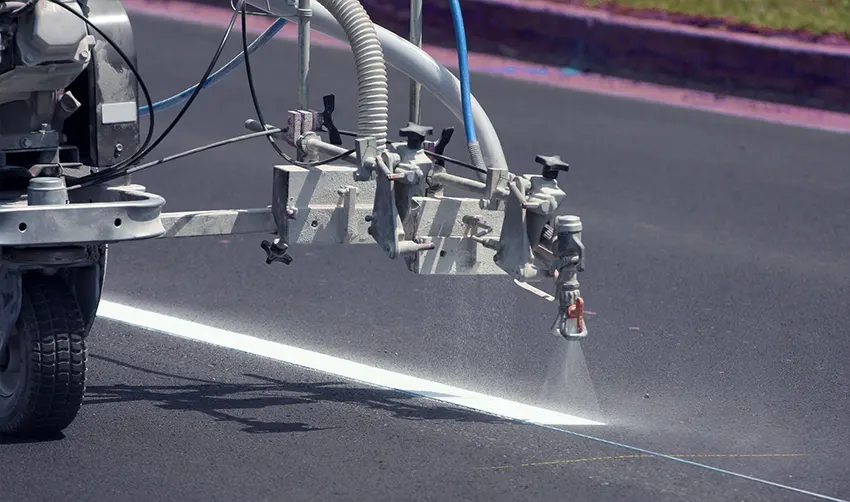
- Marking machine drawing: Using a marking machine to spray the marking line can ensure uniform lines and faster coverage. Place the striping machine where you want to start striping, and start it. Move at a consistent speed along the predetermined route, and the nozzle at the bottom of the machine will spray the marking line evenly by itself.

Marking machine marking lines on asphalt pavement
To improve the efficiency and quality of your asphalt line drawing techniques, time and budget permitting I recommend:
- Use high Quality paint, the better the paint quality, the longer the lines will last.
- For areas with heavy traffic or very rough surfaces, consider applying a second coat for increased durability and clarity.
- Use markers to ensure straight and even lines on the asphalt.
- When working on a large area, you can break it up into smaller pieces. Make the work more manageable.
- After the markings are painted, pay attention to placing barriers or warning signs, and allow cars or pedestrians to pass after they are dry. It takes 1-2 hours for initial drying in normal weather conditions. Allowing asphalt markings to dry completely can avoid frequent touch-ups.
With the right tools and steps, we can get clean, precise and long-lasting lines on the asphalt. Also add that, thoroughly clean the asphalt surface before marking. If there is dirt, grease, or oil, it will prevent the paint from adhering properly. Use a broom or blower to remove any loose dirt and make sure the surface is dry before painting. New asphalt pavement does not need to be cleaned because the dust has not yet arrived.
If the asphalt pavement is already old, it needs to be inspected for cracks or damage. It is best to repair these cracks or damage before painting to ensure smooth and consistent lines. Specific instructions for how to repair asphalt pavement cracks can be found below. We have detailed instructions separately.
How to Fix Cracks in Asphalt Parking Lots?
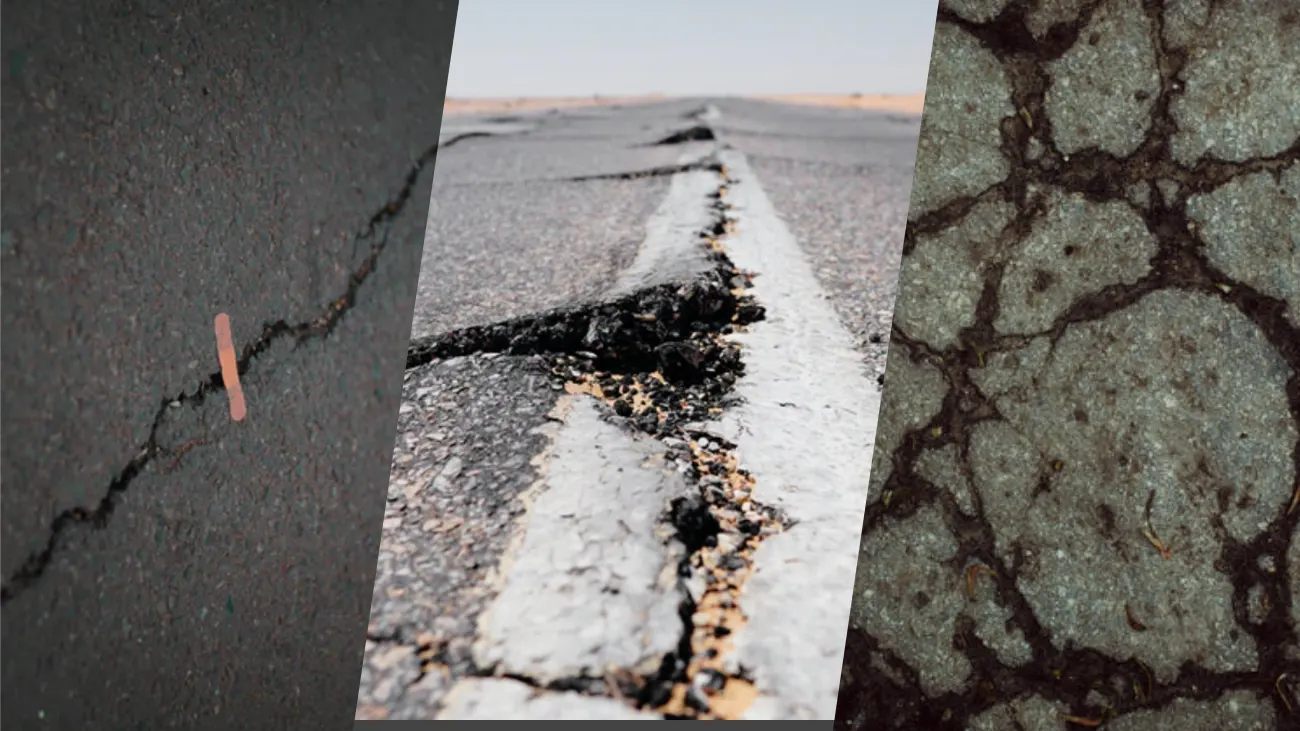
While asphalt pavement is more durable and flexible than cement, it is inevitable that it will crack over time due to weather changes, heavy traffic, and normal wear and tear. If left untreated, small cracks in asphalt pavement can turn into potholes, large cracks, and expensive repairs at that point.
Conditions in nature are complex and changeable, so there are many reasons why asphalt cracks. Here are some common culprits:
- Natural aging: Like everything else, asphalt pavement has a specific lifespan. Careful maintenance can only extend the service life but cannot completely prevent cracks.
- Weather changes: Asphalt expands when it gets hot and contracts when it gets cold. The heat of the summer sun causes the materials that make up asphalt to expand. Over time, this repeated expansion and contraction can cause asphalt to crack.
- Water damage: When the weather is cold, the materials within asphalt shrink tightly. When rain or snow seeps into small gaps and freezes, the ice expands, pushing against the surface of your asphalt parking lot and causing further cracking.
- Heavy Loading: Frequent passing of extremely heavy vehicles can cause structural cracks in asphalt pavement.
- Poor Paving: Asphalt can also crack if it is laid improperly or too thinly.
- Earthquakes: Earthquakes caused by movement in the Earth’s crust can cause large cracks to appear suddenly in asphalt.
There are only a few reasons why asphalt pavement cracks. The most important thing is: cracks are just the beginning. The longer you delay repairing, the larger the cracks will become, eventually causing potholes and further damage. Repairing cracks is not just for appearance.
- Prevent plant damage: Plant seeds will drift in the wind and grow in cracks. If they are not cleaned for a long time, the roots of the plants will put pressure on the road surface as they grow. As plants grow more and more, the pavement of your asphalt parking lot will begin to crack in multiple places.
- Extended service life: Repairs can extend the life of your asphalt, saving you money on repaving the road.
- Safety: Cracks and potholes can cause trips, falls, or vehicle damage.
- Cosmetic appeal: A well-maintained asphalt parking lot makes a great first impression.
- Prevents Water Stagnation: Repairing asphalt cracks immediately can help prevent moisture from becoming trapped in your parking lot foundation.
Make Adequate Preparations.
Repairing a crack is not a difficult task, but adequate preparation between formal sealing repairs is key. Because we are going to apply asphalt crack filler into the crack, thoroughly clean the dirt, weeds and other loose debris in and around the crack within 5 inches.
Usually a small garden trowel, a screwdriver, and a wire brush small enough to get into the crack will do the job. And if you are facing a large area of asphalt pavement that needs repair and don’t want to squat and clean it bit by bit? Use a pneumatic blower, thermal spray gun or crevice cleaner to complete the cleaning more efficiently!
It is generally not recommended to use a hose to clean debris because water tends to absorb into the asphalt. Unless you are willing to wait for it to dry completely.
Finally, check the type of crack. For small cracks, prepare a rubber latex caulk. For deep and large cracks, you will need to fill the crack with sand (leaving a half-inch free depth) before starting to apply caulk.
Start repairing the asphalt gap.
Once everything is ready, it’s time to repair it. Just apply hot pour crack filler or cold pour rubber crack filler to the crack depending on the situation and let it dry naturally. There are several different ways to fill asphalt cracks during the patching process, and exactly how you pour the caulk depends on the size (width and depth) of the crack.

Repairing cracks in asphalt pavement
For small cracks:
Smaller asphalt cracks between 1/6 and 1/2 inch wide are easier to fill. You need to use cold-poured asphalt crack filler made of rubber latex material and mix it to the right consistency. Note that it must be in a liquid state and not too thick, otherwise it will not flow into the deep gaps.
Use a caulking gun or pour it into the crack by hand, and smooth the top of the surface with a trowel. Repeat this process to repair all the small asphalt gaps and wait until they dry.
For large cracks:
When facing asphalt pavement with cracks wider than half an inch, we need to adopt a different strategy because these cracks are often narrower and deeper.
Gravel mixed with sand fills the cracks, and the filling process is repeatedly compacted to a height of 1/2 inch below the asphalt level.
For large asphalt cracks, cold-poured crack fillers are no longer sufficient to support our work. It is recommended to choose hot asphalt repair agents. Use a tamping hammer or tamping rod to tamp the hot asphalt down while pouring, and add more crack filler if sinking occurs. Repeat until the crack is flush with the surrounding asphalt.
For alligator cracks:
Alligator or spider web-like cracks appear in one area of the asphalt pavement. This is caused by the foundation under the asphalt pavement shifting. This situation is very tricky and it is often recommended to remove the entire pavement and repave it.
If you still want to salvage it, you can also combine the small crack repair and large crack repair DIY tips above. Because alligator asphalt cracks vary in size, the repair process needs to be carried out based on actual conditions. Be patient and good luck.
For large repair projects there are crack sealing fusion machines and applicators available. These machines come with a push handle and wheels that attach to the melter, and you simply pour in the asphalt crack sealing solvent and let the machine do the work. No more squatting on the ground to work by yourself, just compact it when necessary.
Here are some tips I learned from surveying asphalt crack repairers to make repairs last longer and look better:
- It’s easier to perform asphalt repairs in cool weather, as hot weather can make the material stickier and harder to work with.
- Before you begin, check the weather forecast to make sure it won’t rain in the next 24 hours.
- When dealing with deep cracks, be sure to ensure that the repair material can penetrate deep enough.
- After the repair is complete, adding a seal coat can enhance protection and make the effort last longer.
- Inspect your asphalt pavement regularly and repair small cracks to save expensive repairs later.
- Do not drive vehicles over cracks until the repaired area is completely dry. Cold caulks take at least 4+ hours to dry, while hot melt asphalt fillers require at least 24 hours to ensure stability and cure.
Fixing cracks in asphalt parking lots is essentially a band-aid that covers up the condition of the asphalt pavement and simply extends the life of the asphalt. If you are a commercial property owner or want to start your own asphalt maintenance business, you can use the coatingsdirectory digital system to quickly and easily find local asphalt coating & repair services. They will all provide you with free expert consultation, saving you time and money by planning and budgeting for future needs.
How to Remove Paint from Asphalt?
When faced with old road markings, accidental spills, and poorly planned asphalt line projects, we have to remove unwanted paint from the asphalt. This seemingly difficult task can be made easy by matching the removal method to the type of paint and its condition. For example, paint and water-based paint that dripped just minutes ago can often be cleaned away with simple methods such as pressure washing or chemical treatments. Oil-based and epoxy paints that have been set for a long time require more aggressive techniques such as grinding or sandblasting to remove them.
Always take the time to evaluate the situation before you begin so that you can decide which method will be most effective. There are five main methods for removing paint from asphalt: chemical paint stripping, pressure washing, grinding, softening with a heat gun, and sandblasting stripping.
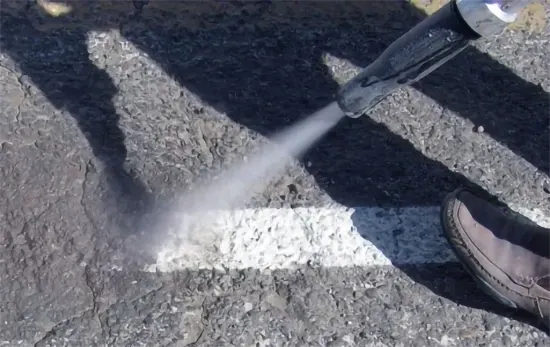
- High-pressure washing:When dealing with new water-based paint and minor spills on asphalt surfaces, high-pressure washing is a good choice. High-speed jets of water can be very effective in loosening and washing away newly applied paint. The process is simple – set the pressure washer to the appropriate level (too high will damage the asphalt, too low will not be strong enough), and then rinse step by step. If the paint doesn’t come off completely with the first flush, repeating the process a few times will usually solve the problem.
- Chemical Paint Stripping:This method is a good choice for smaller asphalt areas or when the paint is relatively new. First, apply the paint remover evenly to the painted surface and give it 10 to 20 minutes for the chemical corrosion reaction to occur. Once the paint softens, scrub the area with a stiff brush and use a high-pressure hose to rinse it off.
- Grinding:When dealing with stubborn or thick layers of old paint on asphalt, using a grinding tool can scrape off the paint layer by layer. This method requires more effort and precision, and is done carefully to avoid creating a pothole in the asphalt surface. This method may leave the asphalt surface looking a little rough, which is very friendly for situations where you need to repaint or resurface.
- Sandblasting:When facing asphalt projects that require large areas to go, such as removing asphalt road markings or thick weathered paint, sandblasting is the best choice. This method uses sand or small particles blasted at high speeds to strip away layers of paint, but it requires an operator with expertise and specialized equipment to perform. If you’re new to using heavy tools, it’s best to leave it to the professionals.

Removing lines on asphalt pavement
| Method | Principle | Key Features | Best For | Cautions |
|---|---|---|---|---|
| Chemical Paint Removers | Breaks down paint’s chemical bonds to loosen it. | Effective on water-based and fresh paint; precise. | Small areas or detailed work. | Use asphalt-safe products; follow instructions to avoid surface damage or environmental harm. |
| High-Pressure Washing | Uses high-pressure water to dislodge paint. | Non-invasive; good for large areas. | Fresh spills or water-based paint on parking lots or driveways. | Avoid excessive pressure to prevent asphalt damage. |
| Grinding or Abrasive Tools | Mechanically scrapes off the paint layer. | Highly effective for tough, dried paint. | Old or thick paint layers; oil-based paint. | Use with care to avoid grinding too deeply into the asphalt. |
| Heat Guns | Softens paint with heat for easier removal. | Useful for bonded paint; avoids chemical use. | Firmly bonded paint that’s not too thick. | Keep the heat gun moving to avoid overheating or melting the asphalt. |
| Sandblasting or Shot Blasting | Uses abrasive material to strip away paint. | Powerful for large-scale or industrial use. | Large areas with heavily bonded paint, like old road markings. | Requires expertise; may roughen the asphalt surface. |
In addition, let me tell you some tips for successfully going out to paint asphalt:
- Whatever method you use, test it on a small, inconspicuous area first to see how the asphalt reacts.
- Remember to always wear gloves, goggles and a mask, especially when working with chemicals, grinding or sandblasting.
- Removing paint from asphalt is a time-consuming process, so be patient.
- After removing the paint, sweep the area again to remove any residue or debris.
Each method of removing paint from asphalt has its own advantages and ideal conditions. Sometimes one method does not achieve the desired removal effect, and we can repeat it multiple times or combine different methods to achieve the desired removal effect.
Common Problems and Solutions for Painting on Asphalt.
| Common Problems on Asphalt Painting | Causes | How to Avoid It | Solutions |
|---|---|---|---|
| Streaks or Uneven Coverage on Asphalt | Poor mixing of asphalt paint, or using the wrong applicator for asphalt surfaces | Always mix the asphalt-specific paint thoroughly and use a high-quality roller, brush, or sprayer designed for asphalt. | Reapply using consistent pressure and even strokes. Ensure proper tools are used for asphalt painting. |
| Bubbling or Blistering of Paint on Asphalt | Excessive moisture trapped under the asphalt paint or painting in hot, humid conditions | Apply asphalt paint in dry, moderate weather conditions. Avoid painting during peak heat or humidity. | Scrape off bubbles, allow the asphalt to dry completely, and repaint in favorable conditions. |
| Paint Running or Drips on Asphalt | Overloading paint applicators or uneven application on asphalt | Apply light, even coats of asphalt paint. Use tools appropriate for the surface texture. | Wipe off excess paint and reapply using light, steady coats, allowing each layer to dry before adding more. |
| Paint Not Adhering to Asphalt | Dirty, oily, or unprepared asphalt surface | Thoroughly clean and prepare the asphalt surface. Remove oil stains and debris before painting. | Clean the area again, sand lightly if needed, and apply a primer or asphalt-specific adhesion promoter. |
| Cracking in Asphalt Paint | Painting in cold temperatures or on uncured asphalt | Ensure asphalt is fully cured and apply paint when the temperature is above 50°F (10°C). | Remove cracked paint and repaint in suitable conditions. Allow paint to cure fully before traffic exposure. |
FAQs
Can i paint liquid rubber over asphalt?
Yes, you can apply liquid butyl rubber coating over roll asphalt flat roofs or asphalt pavement. The flexible and durable protective layer formed by liquid rubber is an excellent choice for sealing and protecting asphalt surfaces.
How to remove asphalt from car paint?
If you accidentally get asphalt on your car, don’t worry we can remove it!
Fresh asphalt can be gently wiped off the affected area with a soft cloth and some warm soapy water. If the asphalt has already cured on the surface of the car, you will need to use a special automotive tar remover or a solvent such as rubbing alcohol.
Can I paint directly over old asphalt markings?
We can paint over old asphalt markings. But cleaning the area thoroughly to remove dirt, oil, or loose paint before applying new paint can improve the adhesion of the new asphalt paint.
If the old markings are badly worn or peeling, it is recommended that you remove the old markings.
What is the best temperature for painting asphalt lines?
The ideal temperature for painting asphalt lines is 50°F to 85°F (10°C to 30°C). Too cold and the paint will not adhere well. Too hot and the paint will dry too quickly, which may cause streaking or uneven coverage. Click here for more practical instructions on applying asphalt paint.

