Have you ever spent hours honing a paint job just to have little bubbles or streaks appear when it dries? Isn’t it awful to have to start again on all? Often, that annoying result may be traced back to one vital action: how you combined your paint.
For a smooth, long-lasting finish, getting mixed paint right—whether it’s a bespoke hue, difficult epoxy, or just achieving that ideal consistency—is very vital. But getting it incorrect? That’s when those annoying problems begin.
Rest assured, we have you covered. From the appropriate instruments to safety advice, this tutorial covers the fundamentals of correctly Mixing Paint. We’ll address typical Paint Defects that appear during application—think unevenness or pinholes—and demonstrate how to prevent or correct them. In addition, useful advice on Storing Mixed Paint so your leftovers are prepared for following time. Let’s make your paint projects perfect!
How to Properly Mix Paints?
Okay, you’ve chosen your color, purchased all the components you need, and are ready to mix them together. But wait… did you actually know how to mix them?
It’s easy to overlook, but getting your paint properly mixed is where a nice finish truly begins, long before you dip a brush or load a sprayer. Imagine it is like cooking: you wouldn’t forget to correctly prepare your ingredients and hope for a great dinner!
The right Mixing Paint steps make sure that the custom color mixing is perfect from top to bottom, that the consistency runs perfectly for easy application, and that the paint does what it’s supposed to do, which is protect and beautify. But it’s not just about avoiding annoying problems later on; it’s also about getting that perfect, professional look you want and making sure that all of your hard work lasts.
Essential Equipment for Mixing Paints.
You don’t need a full-blown workshop to mix paint like a pro—but the right tools? They make all the difference. A few well-chosen essentials can turn guesswork into a smooth, consistent blend every time.

Essential Equipment for Mixing Paints-Mechanical Mixers
- Containers: Graduated cups or buckets with clear markings are vital. They help you accurately measure paint, hardeners, and thinners. Straight-sided containers are generally better than tapered ones for precise volume measurements, especially for Twocomponent paint systems. Disposable or silicone cups are great for easier cleanup, particularly with sticky materials like epoxy.
- Measuring Tools: Besides the graduated cups, digital scales offer great accuracy, especially when manufacturers specify weight-based ratios. This is common for industrial or automotive paints.
- Stirring Tools: Simple, sturdy paint stir sticks work for smaller jobs. Avoid flimsy ones that might break or shed material.
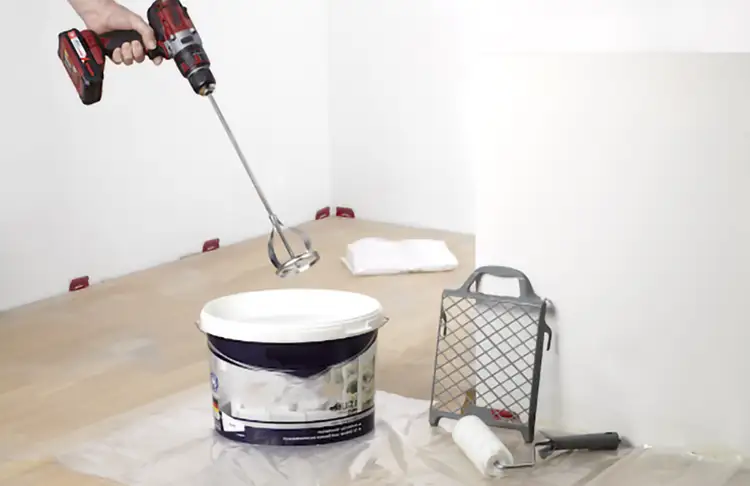
- Mechanical Mixers: It is much better to use an electric or gas drill with a mixing blade tool for bigger batches of paint or paint that is thicker. These mix everything well without adding too many air bubbles. For art paints that come in small bottles, a paint shaker or a vortex mixer works great.
- Paint Strainers/Filters: It eliminates any clumps, dried bits, or other waste, this helps to keep the spray gun from getting clogged and have a better finish.
- Funnels: Allows you to pour the product smoothly into spray gun cups or smaller containers, so reducing spillage.
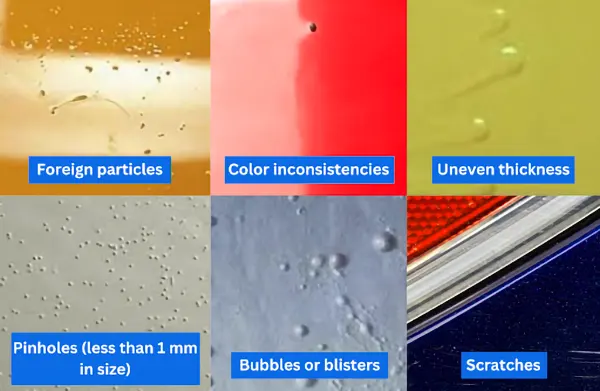
Crucial Safety Gear You Shouldn't Skip.
Mixing paint isn’t just about color—it’s a chemical cocktail. From bold pigments to harsh solvents and VOCs, what gives your finish its beauty can mess with your health if you’re not careful. Gear up with proper PPE—it’s not optional, it’s your first line of defense.
- Gloves: You must wear nitrile gloves or gloves that are immune to chemicals. They keep your skin from getting irritated and chemicals from getting into it.
- Safety goggles: Keep splashes and fumes from getting into your eyes. It only takes one drop to do a lot of damage.
- Mask for your nose and mouth: This is very important when dealing with solvent-based paints or in places where air flow is low. To get rid of dangerous fumes, wear a mask with the right cartridge (usually organic vapor).
- Coveralls, an apron, or old clothes will keep paint off of your face and nice clothes.
- Good Air Flow: You should always mix paint in a room with good air flow. If you can, open the windows and doors, use an air fan, or work outside (but watch out for dust). For paints that can catch fire, make sure the wiring is right to avoid static electricity.
Step-by-Step Paint Mixing Process.
Before you start mixing take a beat—these steps aren’t just routine, they’re your roadmap to a smooth, safe mix every time. Skipping them? That’s how mistakes sneak in.
- Read the Material Safety Data Sheet (MSDS/SDS): Every paint product comes with an MSDS (or the newer SDS format). Read it. It contains vital info on Paint Mixing Ratios, safety precautions, hazards, and what to do in an emergency. It might specify ideal mixing temperatures or warnings about mixing certain components.
- Check Batch Numbers and Expiration Dates: If using multiple cans of the same color, or components like paint and hardener, check that the batch numbers match. This prevents slight color or performance differences. Also, check the expiration dates – old paint might not mix or cure properly. Store paints in cool, dry places away from sunlight.
- Use a Calibrated Mixer or Shaker First: If paint has been sitting, pigments can settle. Use a paint shaker (like those at the store) or a mechanical mixer to get the paint back to a uniform state before you start combining it with other components like hardeners or thinners.
- Accurately Measure for the Optimal Ratio: This is critical. Follow the manufacturer’s recommended Paint Mixing Ratio exactly (e.g., 4:1, 2:1:1). Use your graduated cups for volume or a scale for weight, based on the instructions. Don’t guess or estimate. Being off even a little can affect drying time, durability, and finish quality. For example, a 4:1:10% ratio means 4 parts paint, 1 part hardener, and then 10% of that combined total volume added as thinner.
- Follow the Recommended Mixing Time: Stir thoroughly but gently. You want everything blended, but vigorous stirring can introduce air bubbles, leading to Paint Defects. Manufacturers often suggest a mixing time (like 1-2 minutes). For two-part paints (like epoxies), there might be an “induction time” or “sweat-in time” – a waiting period after mixing (maybe 10-30 minutes) before you use the paint. This allows the chemical reaction to start properly. Keep an eye on the pot life (how long the Mixed Paint stays usable).
- Filter Before Application: Always strain your Mixed Paint through a filter just before you put it in your sprayer or tray. This catches any last bits of debris or clumps, ensuring a smooth flow and preventing surface imperfections. Use a funnel for clean pouring.
Helpful Mixing Tips for Success.
Beyond the basic steps, a few extra pointers can make your Mixing Paint process smoother:
- Pay Attention to Environmental Factors: Aim for the manufacturer’s recommended temp, usually around 65–75°F (18–24°C). Cold slows things down; heat speeds things up (sometimes too much, shortening pot life). High humidity is bad, especially for certain paints, as it can trap moisture and cause paint defects like blushing. Try to work in drier conditions if possible. Good airflow is crucial for safety (fumes) and helps with proper drying. Avoid dusty or windy spots that can introduce contamination.
- Choose the Right Tools: Mechanical mixers are worth it for larger jobs or thick materials. Paddle choice matters too – some are better for thick stuff, others for liquids. For small hobby bottles, a vortex shaker is fast and effective. Precision scales remove guesswork for weight-based ratios.
- Allow Enough Time: Don’t rush the Mixing Paint stage. Ensure everything is fully blended. If there’s an induction time, respect it. It’s better to take an extra minute here than deal with Paint Defects later. Maybe test a small amount first if unsure.
- Clean Tools Immediately: Dried paint is hard to remove and can contaminate future mixes. Clean everything right after use.
- Avoid Overmixing: Especially with epoxies or gloss paints, mixing too fast or too long can whip air into the paint, causing bubbles in the final finish. Gentle and thorough is the goal.
- Use Quality Materials: Good quality paints, hardeners, and thinners generally mix better and give more predictable results.
- Keep Records: Note down the ratios, batch numbers, and conditions for successful mixes. This helps replicate results and can be useful for tracking.
Think of mixing paint like tuning an instrument—get it right, and everything that follows sings. Take a few extra minutes now, and you’ll see it in every smooth stroke and long-lasting finish later.
FAQs
Why is checking the batch number important when Mixing Paint?
It ensures consistency; using Mixed Paint components from different batches can cause slight color or performance variations. Professionally, this step helps guarantee uniformity across a large project or when using multi-component systems.
What's the best temperature range to Store Paint?
Keep it stable between 50-80°F; this prevents freezing or overheating which can ruin Mixed Paint. Professionally, storing paint within the manufacturer’s recommended range (often 60-75°F) preserves its chemical stability and shelf life, avoiding Paint Defects later.