Article Chapters
Have you ever wondered how water-based paint is applied? How it changes our world. In this guide, we’ll take a closer look at applying, cleaning, thinning, and drying these versatile paints. Whether you’re a DIYer or a professional, mastering these techniques will help you achieve beautiful results while minimizing your impact on the environment.
How to apply water based paints?
Think of your home as a canvas waiting for the brush of creativity to transform its walls into a masterpiece. Using water-based paint, this artistic endeavor becomes not just a task but a joyful experience. Here’s a step-by-step guide on how to apply water-based coatings like a pro:
- Step 1: Check and Prepare
Before you begin painting, inspect the surface for any existing oil-based paint. If present, you will need to remove it to ensure proper adhesion of the water-based paint. - Step 2: Surface preparation
Improve surface smoothness by repairing any cracks, holes or imperfections. Sanding the surface can help smooth out rough areas and create a better bonding surface for water-based paint. - Step 3: Clean the Surface
Use a damp cloth or vacuum cleaner to remove all dust, dirt, and debris from the surface. A clean surface ensures that the paint adheres properly and creates a smooth surface. - Step 4: Apply Water-Based Primer
Apply a water-based primer to the surface. This not only enhances paint adhesion but also helps achieve a more even finish. Allow the primer to dry completely according to the manufacturer’s instructions. Manual brush or roller coating is usually used for interiors, and spraying processes may be used for exterior walls. - Step 5: Apply Water-Based Topcoat
Now comes the final step – applying the water-based topcoat. Use a high-quality brush or roller for best results. Start by cutting the edges with a brush, then fill in the rest of the surface with a roller for a smooth, even coat.
Other tips and tricks
- Thin Coats: It’s better to apply several thin coats of paint rather than one thick coat. This helps achieve a more even finish and reduces the risk of dripping.
- Dry between coats: Allow each coat to dry completely before applying the next. This ensures proper adhesion and prevents the paint from peeling or cracking.
- Cleaning: Clean brushes and rollers with soap and water immediately after use. This will help extend their lifespan and keep them in good condition for future use.
- Ventilate and dry: If you are working indoors. Remember to keep your home well ventilated during and after construction. Although water-based coatings are low-VOC, the additives and binders in them will always have a slight smell. This will help the paint evaporate and keep the air fresh.
By remembering these steps and tips, you can unleash your creativity and give your home a new look with water-based paint.
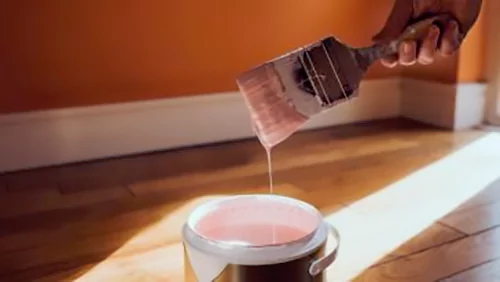
 Enjoy the process and use your imagination!
How to clean water based paints?
Picture this: you’ve just put the finishing touches on your masterpiece – the walls of your living room have been freshly painted in a color that perfectly matches the mood you want to create. But oh! Construction errors and paint splatters happen. There are wild splatters that leave marks on the floor, on your hands, and even on the dog. Or find out you used the wrong water-based coatings! Often, we can paint over dry water-based paint without necessarily needing to remove it. But if your project requirements must be removed, the process is not too difficult. Because the art of cleaning water-based coatings is easy and environmentally friendly.
How to remove fresh water-based coatings?
- Step 1:For paint still singing in its wet chorus, water is your knight in shining armor. Simply dampen a cloth or sponge with water and gently dab at the rogue paint. For clothing, a quick plunge under cold running water can work wonders before the paint has time to set into its final form.
- Step 2:A mild soapy water can assist in lifting the paint from surfaces without the need for an epic battle. It’s like charming the paint away with a melody only it can hear.After softening and wiping, remember to clean it again with clean water.
Please note: If you are only removing a small area, please wipe carefully during this process to reduce spread.
How to remove dried water-based paint?
If it is a high-quality water-based paint that has been applied for a long time and has completely dried and solidified, some skills are required. It is like concrete and has extremely strong adhesion after curing. It would then fancy itself a permanent part of the landscape, but there are ways to prove it wrong:
- Method 1: Paint Strippers
Paint strippers are like powerful wizards that can dissolve the paint’s bond to the surface. Apply according to the potion’s—err, product’s—instructions, let it work its magic, then remove the paint with ease. Always wear gloves and work in a well-ventilated area to avoid any curses (toxic fumes). Note that you will need to rinse off all paint stripper with soapy water before starting your next coat. - Method 2: Heat Gun
A heat gun can gently warm the paint, softening it back into submission. It’s like coaxing a dragon to lower its defenses, allowing you to scrape away the paint without harming the surface beneath. Just be careful not to overheat and damage the surface underneath, and you’ll need to be careful about scraping off the paint. Don’t worry if you accidentally cause damage, you can remediate it by sanding the damaged area until it’s smooth and filling in any chips or dents before painting. - Method 3: Scrapers
Armed with a scraper or a putty knife, you can engage in close combat with the dried paint. Gently nudge under the edges of the paint and lift it away. It’s a test of patience and precision, but victory is sweet. - Method 4: Sanding
For the most stubborn paint, sanding can wear it down, layer by layer. It’s a battle of attrition, turning your foe into mere dust to be wiped away. Ensure you wear a mask, as this method can generate a cloud of dust that shouldn’t be inhaled.
Cleaning water-based paints, whether still wet or defiantly dry, need not be a daunting task. With the right tools and techniques, you can restore order to your kingdom, leaving no trace of the battle that took place. So go forth, armed with knowledge, and fear no paint!
How to dilute water based paints?
Imagine standing in front of your latest project, paintbrush in hand, ready to transform a plain wall into a colorful canvas. But alas, your water-based paint is as thick as the plot of a mystery novel and won’t glide smoothly across the surface. Don’t be afraid, because diluting water-based coatings is very simple: pour a portion of the paint into a clean bucket, then gradually add water and stir with a stir stick until completely mixed. Let’s take a look at how to do it.
Before embarking on this alchemical adventure, ensure you have the following: A clean mixing container/Water/A stirring stick.
- Step 1: Understanding Your water-basedPaint’s Personality
Not all water-based paints are created equal—some are introverts, preferring minimal interaction with water, while others are more extroverted, welcoming generous amounts of hydration. Begin with a small test to understand how your paint reacts. Think of it as getting to know a new friend before inviting them to a party. - Step 2: The Art of Adding Water
Start by transferring some coatingsto your mixing container. With the grace of a tea ceremony, add water in small increments—about 10% of the paint volume to start. Like coaxing a cat out from under the bed, patience is key. The exact amount of water required depends on the paint you are using and the construction process, and you can ask the seller when purchasing the paint for specific ratios. - Step 3: Stirring the Cauldron
Gently stir the mixture, combining the elements with the care of a master potion-maker blending ingredients for a spell of smoothness. Observe the paint’s consistency; it should flow like a gentle stream, not run like a river or sit stubbornly like a mud puddle. - Step 4: The Test of the Canvas
Apply a small amount to your surface or a test canvas. Watch how it behaves—does it cover with the elegance of a royal cloak, or does it soak in, leaving a wanting gaze? Adjust as necessary, adding more water or paint to achieve the desired consistency.
Once you’ve achieved the perfect mix, your water-based coatings can transform your project from mere idea to a visual feast. Remember, the key to diluting water-based paint is understanding its properties, approaching with patience, and making precise adjustments.
In the end, the process of thinning paint is a lot like brewing a potion or writing a story. It requires a balance of knowledge, intuition and magic. So get started with confidence knowing you have what it takes to bring your vision to life with perfect paint consistency.
How long does water based caotings take to dry?
Water-based coatings, like a fine wine, takes its time to mature into a beautiful finish. On average, it dries to the touch within 1-2 hours, but the curing process—where it reaches its full strength and durability—can take anywhere from 1 to 6 hours. However, several factors influence this timeline, so let’s delve into them:
Temperature:
- Hot and Dry: In warmer, arid conditions, water-based coatingscan dry faster, potentially within 30 minutes to 1 hour.
- Cool and Humid: Conversely, in cooler, humid environments, drying time can extend to 2-3 hours or more.
Humidity:
- Low Humidity: Dry air absorbs moisture more readily, speeding up the drying process.
- High Humidity: Moisture-laden air slows down drying, requiring more time for the coatingto cure.
Ventilation:
- Good Airflow: Proper ventilation helps water-based paint dry faster by carrying away evaporating water molecules.
- Poor Airflow: Without good ventilation, the drying process can be prolonged.
Coatings Thickness:
- Thin Coats: Applying thin, even coats promotes faster drying.
- Thick Coats: Thick applications take longer to dry and cure, potentially leading to uneven drying and surface imperfections.
Type of Water-Based coatings:
The different additive ratios and resin type components used in water-based coatings will also directly affect the curing time of the coating. Take the most common acrylic paints and latex paints as examples: Acrylic paints generally dry faster than latex paints in the same environment due to their chemical composition. For more detailed water-based paint types and basic knowledge, you can go to our corresponding blog to learn about it.
Additional Tips:
- Avoid Excess Humidity: High humidity can prolong drying time. Consider using a dehumidifier in humid conditions.
- Optimal Conditions: Aim for temperatures between 50-85°F (10-29°C) and humidity levels below 85% for ideal drying conditions.
- Patience is Key: Rushing the drying process can lead to surface imperfections. It’s best to allow the paint to dry and cure naturally for the best results.
In conclusion, while water-based coatings offers many benefits, including faster drying times compared to oil-based alternatives, factors like temperature, humidity, and ventilation play crucial roles in determining how long it takes to dry. By understanding these factors and ensuring optimal conditions, you can achieve a flawless finish with your water-based coatings project.
In summary, water-based coatings offer a wide range of benefits, from ease of application and cleaning to reduced environmental impact. By following the tips and techniques outlined in this guide, you can get the most out of these coatings in your projects. If you have recent needs for water-based coatings, you can use the refined filtering function of coatingsdirectory.com to find reliable suppliers. to obtain products that meet your requirements.
Is water based paint toxic?
Water-based paint, also known as latex paint, is generally considered to be less toxic than solvent-based paints. They are very safe to use. However, this does not mean that water-based paints are completely non-toxic. They can still contain small amounts of volatile organic compounds (VOCs) and other chemicals that can be harmful if inhaled or ingested.
To reduce exposure to potentially harmful chemicals, it is advisable to use water-based paints in well-ventilated areas and to wear appropriate personal protective equipment, such as gloves and a mask, when painting.
How to make water-based paint dry faster?
I believe you have read the factors and tips we mentioned above that affect the drying time of water-based paint. Therefore we can conclude that if you want water-based paint to dry faster, temperature, humidity and airflow play a key role. Therefore, we need a warm, dry and ventilated environment of 10-29°C to help the water-based paint dry faster.
How long does it take to move into a newly painted room?
The time it takes to move into a newly painted room depends on several factors, including the type of paint used, how well the room is ventilated, and the size of the room.
Generally speaking, water-based paints dry faster than solvent-based paints, usually within a few hours. However, it’s worth noting that while the paint may feel dry to the touch, it may still release harmful chemicals into the air.
To be on the safe side, avoid using a freshly painted room for 2 to 3 days if possible. If you use high solvent-based paint (oil-based paint) it will take at least 1 week (or even longer, depending on the solvent content of the paint) before it can be moved in.
Also, keep young children and people with breathing problems away from freshly painted rooms. If you feel watery, have a headache, feel dizzy or have trouble breathing, this is a sign of danger and leave the painted area immediately.
How to get water based paint out of clothes?
Removing water-based paint from clothes requires prompt and careful treatment to avoid setting the stain. Follow these steps for effective removal:
- Act Quickly: The sooner you address the paint, the easier it will be to remove. If the paint is still wet, use a spoon or a dull knife to gently scrape off as much paint as possible without spreading it further.
- Rinse with Water: Run cold water through the back of the stained fabric. This helps push the paint out of the fibers rather than deeper into them. Avoid hot water, as it can set the paint.
- Apply Stain Remover: Pre-treat the stained area with a liquid laundry detergent, gently working it into the fabric with a soft-bristled brush. Let it sit for a few minutes. For tougher stains, you may use a commercial stain remover, but always check the garment’s care label first.
- Launder as Usual: Wash the garment according to the care label instructions, using the hottest water safe for the fabric. Before drying, check the stained area. If the stain persists, repeat the treatment steps before drying, as heat can set the paint permanently.
- Check and Dry: Once the stain is fully removed, dry the garment as directed on the care label. Avoid using high heat until you’re certain the stain is gone.
How to remove water based paint from concrete?
Concrete is porous, making it challenging to remove water-based paint once it dries. However, with the right approach, you can effectively clean your concrete surfaces:
- Soap and Water: For freshly applied water-based paint, soap and warm water usually do the trick. Use a stiff brush to scrub the area thoroughly. Rinse and dilute with hose and repeat as needed.
- Power Washing: A power washer can be effective, especially for larger areas. The high pressure can remove not only the surface paint but also what has penetrated into the pores of the concrete.
- Paint Stripper: Choose a paint stripper suitable for concrete and water-based paint. Apply it according to the manufacturer’s instructions, usually by spreading a thick layer over the paint and allowing it to sit. Use a scraper or stiff brush to remove the paint as it softens. Rinse the area thoroughly afterward.
- Sanding or Grinding: For stubborn paint, mechanical methods like sanding or grinding may be necessary. These methods are more abrasive and should be used with caution to avoid damaging the concrete surface. Always wear protective gear to guard against dust and debris.
- Chemical Paint Removers: There are eco-friendly chemical removers specifically designed for concrete. These products are less harsh than traditional paint strippers and can be a good option for sensitive areas.
After employing any chemical or abrasive method, it’s important to clean the area thoroughly to remove any residual chemicals or paint particles. Protective gear such as gloves, eye protection, and masks should be used throughout the process to ensure safety.