

Having the right auxiliary tools is just the beginning. To achieve professional-level results when applying ceramic coating, the most difficult and time-consuming part is not the coating itself, but the preparation. Ensuring a clean, streak-free paint surface is essential. Don’t be tempted to skip the following pretreatment steps, otherwise you will regret it when the coating falls off prematurely or the effect is poor!
- Wash and dry the car thoroughly
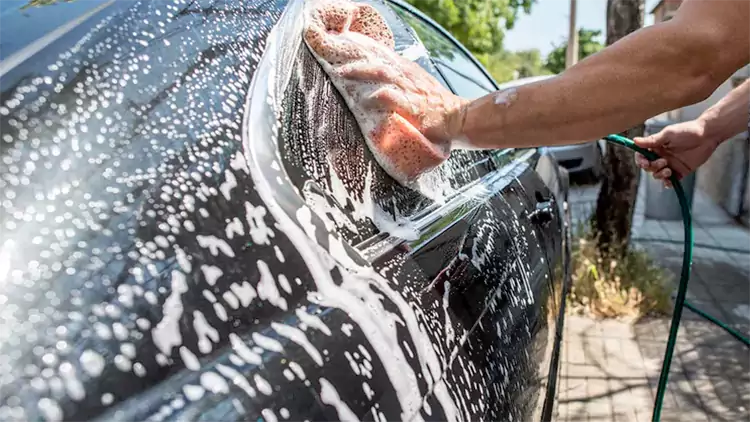
Cleaning car paint
First, wash the car thoroughly with a high-quality car wash liquid and water or a spray gun. Pay special attention to areas where dirt and grime have accumulated, such as the underside of the car and the wheels. Chances are you’ve already washed your car or it’s a new car, but there’s still soap residue and other things on the paint. Use an iron decontamination spray to remove brake dust and industrial dust from the painted body panels. Then dry the car with a clean, soft microfiber towel, avoiding water spots for a streak-free finish.
- Use a clay bar to remove contaminants
Run your hand over the paint. Feel those tiny bumps? That’s stubborn dirt stuck to the paint. Even after washing, there may still be some contaminants on the surface of the car, and the right application needs to remove these contaminants. For a perfectly clean canvas for ceramic coating, lubricate the area with clay lubricant or detail spray, then gently glide the clay bar over the paint. Any stubborn impurities that may be lurking in the clear coat (such as industrial dust, tree sap, and road tar) can be removed. The best results often depend on this extra step. Check the surface of the clay regularly to make sure you haven’t rubbed dirt back into the paint. When the surface feels smooth, move on to the next section. Repeat until the entire car is finished.
- Polish the paint and remove scratches (if needed)
To ensure the ceramic coating adheres effectively and enhances the final effect, it is crucial to polish the paint. Use a dual-action polisher equipped with a foam pad and a high-quality polish. Polish in small areas, applying moderate pressure and overlapping polishes to remove swirl marks, light scratches and other minor imperfections while clearing any airborne debris that may have become lodged in the surface. Click here for a detailed, hands-on guide to repairing scratches. For particularly noticeable scratches or scuffs, take it to a body shop for some paint repairs.
If you are dealing with a new car that has never been driven, a light polish with a polish may be all you need. Polishing helps increase the shine and clarity of the paint and allows the ceramic coating to bond better.
- Final Check
Clear any hidden moisture in the gaps between panels that could mess up the ceramic coating. Then, give it a final clean with a prep spray to remove any last-minute contaminants and wipe it off thoroughly with a clean microfiber cloth.
The time-consuming cleaning phase is now complete, and it’s time to apply a glassy layer of ceramic coating. Do this in small sections, be safe, and be patient.
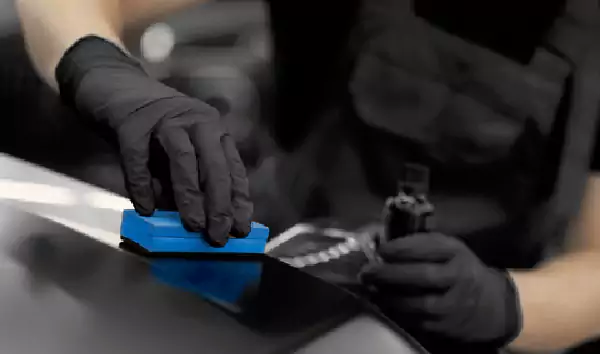
Formal application of ceramic coating
Start by shaking the ceramic coating evenly and applying the appropriate amount onto the sponge applicator. Usually 5-8 drops of paint are enough, and if it doesn’t glide smoothly over the paint, add a few more drops as needed.
Then divide the paint into small areas of about 3’ x 3’ and apply the ceramic coating in slightly overlapping straight lines over the small areas. Go from top to bottom or left to right. Then, apply it again in the opposite direction. This technique is sometimes called cross-hatching. Gradually apply the ceramic coating to the entire vehicle. Throughout the process, keep an eye on the appearance of the applicator. If you see silica crystals forming (usually you can feel the applicator getting brittle), you need to replace the applicator with a new one. So it’s recommended that you have a few applicators.
As the ceramic coating bonds to the surface of the car and begins to dry, you’ll see the “rainbow effect”. The coating will become blurry after a minute. This is called the flash time, and the length of time depends on the ambient humidity, temperature, and composition of the ceramic coating.
Finally, after the coating has flashed off, use a clean microfiber towel to gently wipe off any excess coating from the area just applied. Make sure to wipe in straight lines to keep the coating consistent. Be sure to wipe off the top layer before it dries. If you forget, the ceramic coating may appear rough due to an uneven surface.
Tips:
- Apply ceramic coating in a well-ventilated, dust-free area. We strongly recommend to use a protective mask and gloves to avoid solvent exposure.
- The ideal ambient temperature for applying a ceramic coating is 25°C (+/-5°C). If the surface is too hot, the liquid will cure too rapidly, making polishing very difficult.
- At first, the surface must be thoroughly cleaned using an isopropyl alcohol (IPA) spray to remove any dirt and oils. It is good practice to wear nitrile gloves during this step to avoid contamination.
- After prepping the paint, the applicator should apply the ceramic coating in a cross-hatch pattern. It’s efficient to achieve even coverage, reducing the risk of swirl marks.
- A microfiber cloth can assist with the application to ensure a smooth layer.
- Waiting for the flash time is vitally important.It allows the coating to start setting before applying a second coat to enhance hydrophobic properties,providing better water beading and paint protection.
- If an indoor space is unavailable, and you must apply an automotive ceramic coating outdoors, seek the shelter of a carport and keep a close eye on the weather forecast.
At this point we have perfectly applied the ceramic coating to the surface of the car paint, but don’t rush to drive the car away. Only by giving sufficient time for the ceramic coating and car paint to fully integrate and cure can the best protection be achieved.
Following the application of a ceramic coating, a vital stage known as the curing process begins. The duration of this curing period can vary widely,generally, curing time is around two weeks, but only occasionally. Depending on the product used and coating application, it may vary from 24 hours to 3 weeks.Some ceramic coatings are effective immediately after application, while others can take weeks to achieve the desired hardness and protective properties. The reason for this wide range of time depends on many factors:
- Ambient temperature:Higher temperatures tend to speed up the curing process, while lower temperatures extend the curing time.
- Ambient humidity: Lower humidity and airflow require longer to fully cure.
- Ceramic coating composition type:Different ceramic coatings have different compositions and chemistries that directly affect their curing time.
- Ceramic coating brand formulation:Some ceramic coating brands have unique formulations specifically formulated to achieve fast cure times, perfect for situations where time is of the essence.
- Coating thickness:Thicker ceramic coatings naturally take more time to fully cure than thinner coatings.
As mentioned above, the time it takes for a ceramic coating to complete the full curing process will vary based on a number of factors. But in general, the curing process can be divided into two stages: initial cure and full cure.
Initial Cure:
The initial curing stage, where most of the solvent evaporation occurs, typically takes between 24 to 48 hours. During this time, it’s essential to keep your vehicle in a dry, controlled environment to prevent contamination.
Full Cure:
Achieving a full cure, where the ceramic coating is at its maximum hardness and durability, can take several days to a few weeks. Some coatings may reach their peak performance after a month or longer.
Each brand of ceramic coating will come with its manufacturer-recommended curing time, which can range from a few hours to several days.
During the curing of ceramic coatings, a series of chemical reactions involving solvent evaporation and chemical cross-linking occur.
- During the initial stages, the volatile solvents in the ceramic coating evaporate. As the solvent evaporates, the coating begins to solidify, and the “rainbow flash” effect mentioned in the painting process above marks the beginning of the curing process.
- After the solvent evaporates, the ceramic coating chemically cross-links with the vehicle’s paint to form a strong bond. Chemical cross-linking is critical to creating the wear, chemical and environmental resistance of ceramic coatings.
When properly cured, ceramic coatings can outlast wax and paint protection.
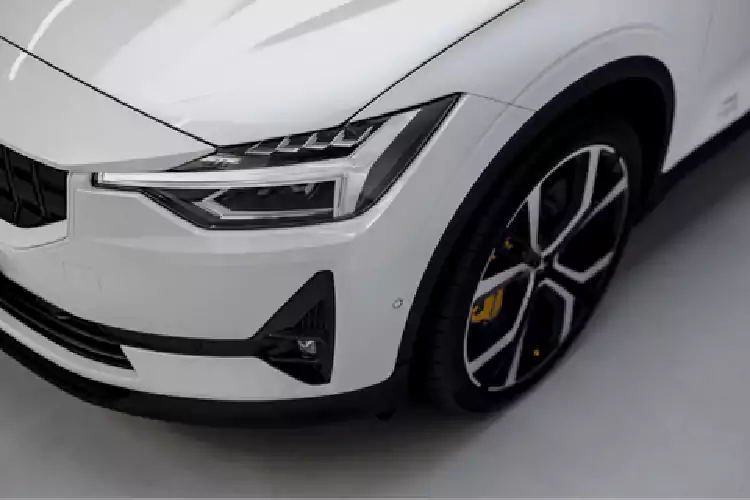
Car paint effect with ceramic coating
Ceramic coating cure time in the sun.
We’ve mentioned earlier that high temperatures can help shorten the curing period.
However, this does not mean it’s okay to have prolonged exposure to intense UV rays during the curing time — it should be the other way around.
Rapid curing in the scorching heat will not only dry the coat but might cause uneven application or premature drying. We only suggest letting it dry in the sun after 3 to 4 hours from the application, with the help of some soft microfiber towels.
Ceramic coating cure time in cold weather.
Curing in cold weather introduces a unique set of challenges. While it is still possible to fix it, the ceramic coating cure time will eventually slow down in cold weather.
You must also be sure that the temperature is appropriate. If the temperature reaches below 4.40°C, the curing process will take much longer, rendering the coating useless.
| Application Scenario | Ceramic Coating Type | Environmental Conditions | Curing Time Range |
|---|---|---|---|
| Automotive Coating | Silica-based Ceramic Coating | Room Temperature (20-25°C), 50-60% RH | 24-48 hours |
| High Temperature (30-35°C), 70-80% RH | 12-24 hours | ||
| Nano Ceramic Coating | Room Temperature (20-25°C), 50-60% RH | 12-24 hours | |
| High Temperature (30-35°C), 70-80% RH | 6-12 hours | ||
| Industrial Equipment Coating | Alumina-based Ceramic Coating | Room Temperature (20-25°C), 50-60% RH | 48-72 hours |
| High Temperature (30-35°C), 70-80% RH | 24-48 hours | ||
| Silicon Carbide-based Ceramic Coating | Room Temperature (20-25°C), 50-60% RH | 72-96 hours | |
| High Temperature (30-35°C), 70-80% RH | 48-72 hours | ||
| Building Exterior Coating | Silica-based Ceramic Coating | Room Temperature (20-25°C), 50-60% RH | 24-48 hours |
| High Temperature (30-35°C), 70-80% RH | 12-24 hours | ||
| Nano Ceramic Coating | Room Temperature (20-25°C), 50-60% RH | 12-24 hours | |
| High Temperature (30-35°C), 70-80% RH | 6-12 hours | ||
| Kitchenware Coating | Silica-based Ceramic Coating | Room Temperature (20-25°C), 50-60% RH | 24-48 hours |
| High Temperature (30-35°C), 70-80% RH | 12-24 hours | ||
| Nano Ceramic Coating | Room Temperature (20-25°C), 50-60% RH | 12-24 hours | |
| High Temperature (30-35°C), 70-80% RH | 6-12 hours |
During the curing process, it is crucial to carefully handle the coating surface and avoid any external factors that may hinder adhesion or affect the effectiveness of the ceramic coating. Here are some things to avoid during the curing of ceramic coatings.
Factors affecting the curing of ceramic coatings
Water and Moisture:
Keep your vehicle dry while your ceramic coatings cure. Avoid washing the car or exposing it to rain, as water can interfere with the bonding process and reduce the effectiveness of the protective properties. I know you can’t wait, but don’t drive your freshly coated vehicle in the rain!
Minimize Contact:
Just like applying a new coat of paint to a wall, minimize contact with the coated surface until the coating is fully cured. Provide proper ventilation when conditions permit.
Allow Sufficient Curing Time:
Patience is key. While the initial application may seem to be done in a few hours, the coating must be allowed to fully cure. The recommended curing time in the ceramic coating instructions should be followed for best results. Keep in mind that prematurely exposing your coating to external elements can compromise its adhesion and overall performance.
Parking the vehicle outdoors:
Avoid parking the vehicle under trees or in areas where airborne contaminants may be present during the curing period of the ceramic coating. Falling debris, tree sap, bird droppings or construction dust can interfere with the chemical crosslinking of the coating. By keeping the vehicle in a controlled environment (indoors), the risk of external contaminant elements being deposited on the coating before it is fully cured can be minimized.
Extreme temperatures:
Ambient temperature can significantly affect the curing time of a ceramic coating. It is generally recommended to allow the coating to cure slowly at normal room temperature (10-35°C). Extremes of both high and low temperatures can upset the balance of cure, potentially resulting in uneven application or reduced durability.
Once the ceramic coating is completely cured, we can enjoy the benefits (beauty and practicality) that the ceramic coating brings to us. But thoughtful car owners may have one question in mind after investing in protecting their vehicles – “How long can ceramic coatings last?” Typically, ceramic coatings last between two and five years. However, there are many factors that affect their lifespan and may force you to replace them earlier than expected.
Life of ceramic coatings
- Application Surface Type: Surfaces on which ceramic coatings can be applied include paint, glass, trim, wheels, etc. Of course, interior leather, vinyl, and interior fabrics can also be coated with ceramic coatings, but the lifespan will not be as long as smooth surfaces.
- Coating type: High-quality ceramic coatings provide longer-lasting protection than ordinary consumer-grade products.
- Coating thickness: The more layers of coating, the more durable it is, resulting in a high-quality and longer-lasting coating. But don’t make it too thick ~ otherwise marks will easily appear during application.
- Application Process: Proper and professional application ensures that the coating blends perfectly with the substrate.
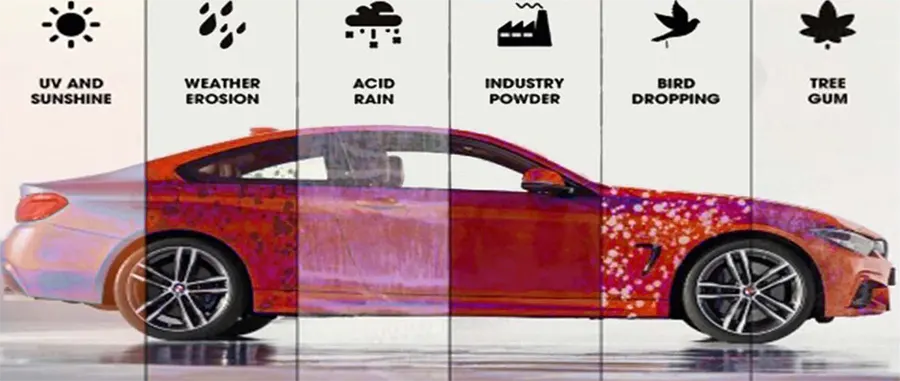
- Environmental conditions: Weather conditions, UV radiation, bird droppings, tree sap and other contaminants during use can affect the service life of the coating.
- Maintenance: Proper maintenance can extend the life of the coating, but the wrong methods (using strong chemical cleaners, polishing, etc.) can reduce the effectiveness of ceramic coatings.